Welcome to another installment of my rigorous cosplay tutorials! Today I have to talk to you about how I made Morrigan’s collar. The truth is that it has been a very interesting element to make.
Since, in general, I tend to make cosplays that are more of a space slut, it has been a long time since I had to make a necklace of this gypsy style and I had a great time.
![]()
The materials I used for this task are the well-known, revered and canonized Worbla (Rhenoflex 5000!!), PVC foam (also known as Forex) and Smooth-Cast 65-D polyurethane foam with their corresponding plasticine and mold prototypes of sylicon.
Let us begin!
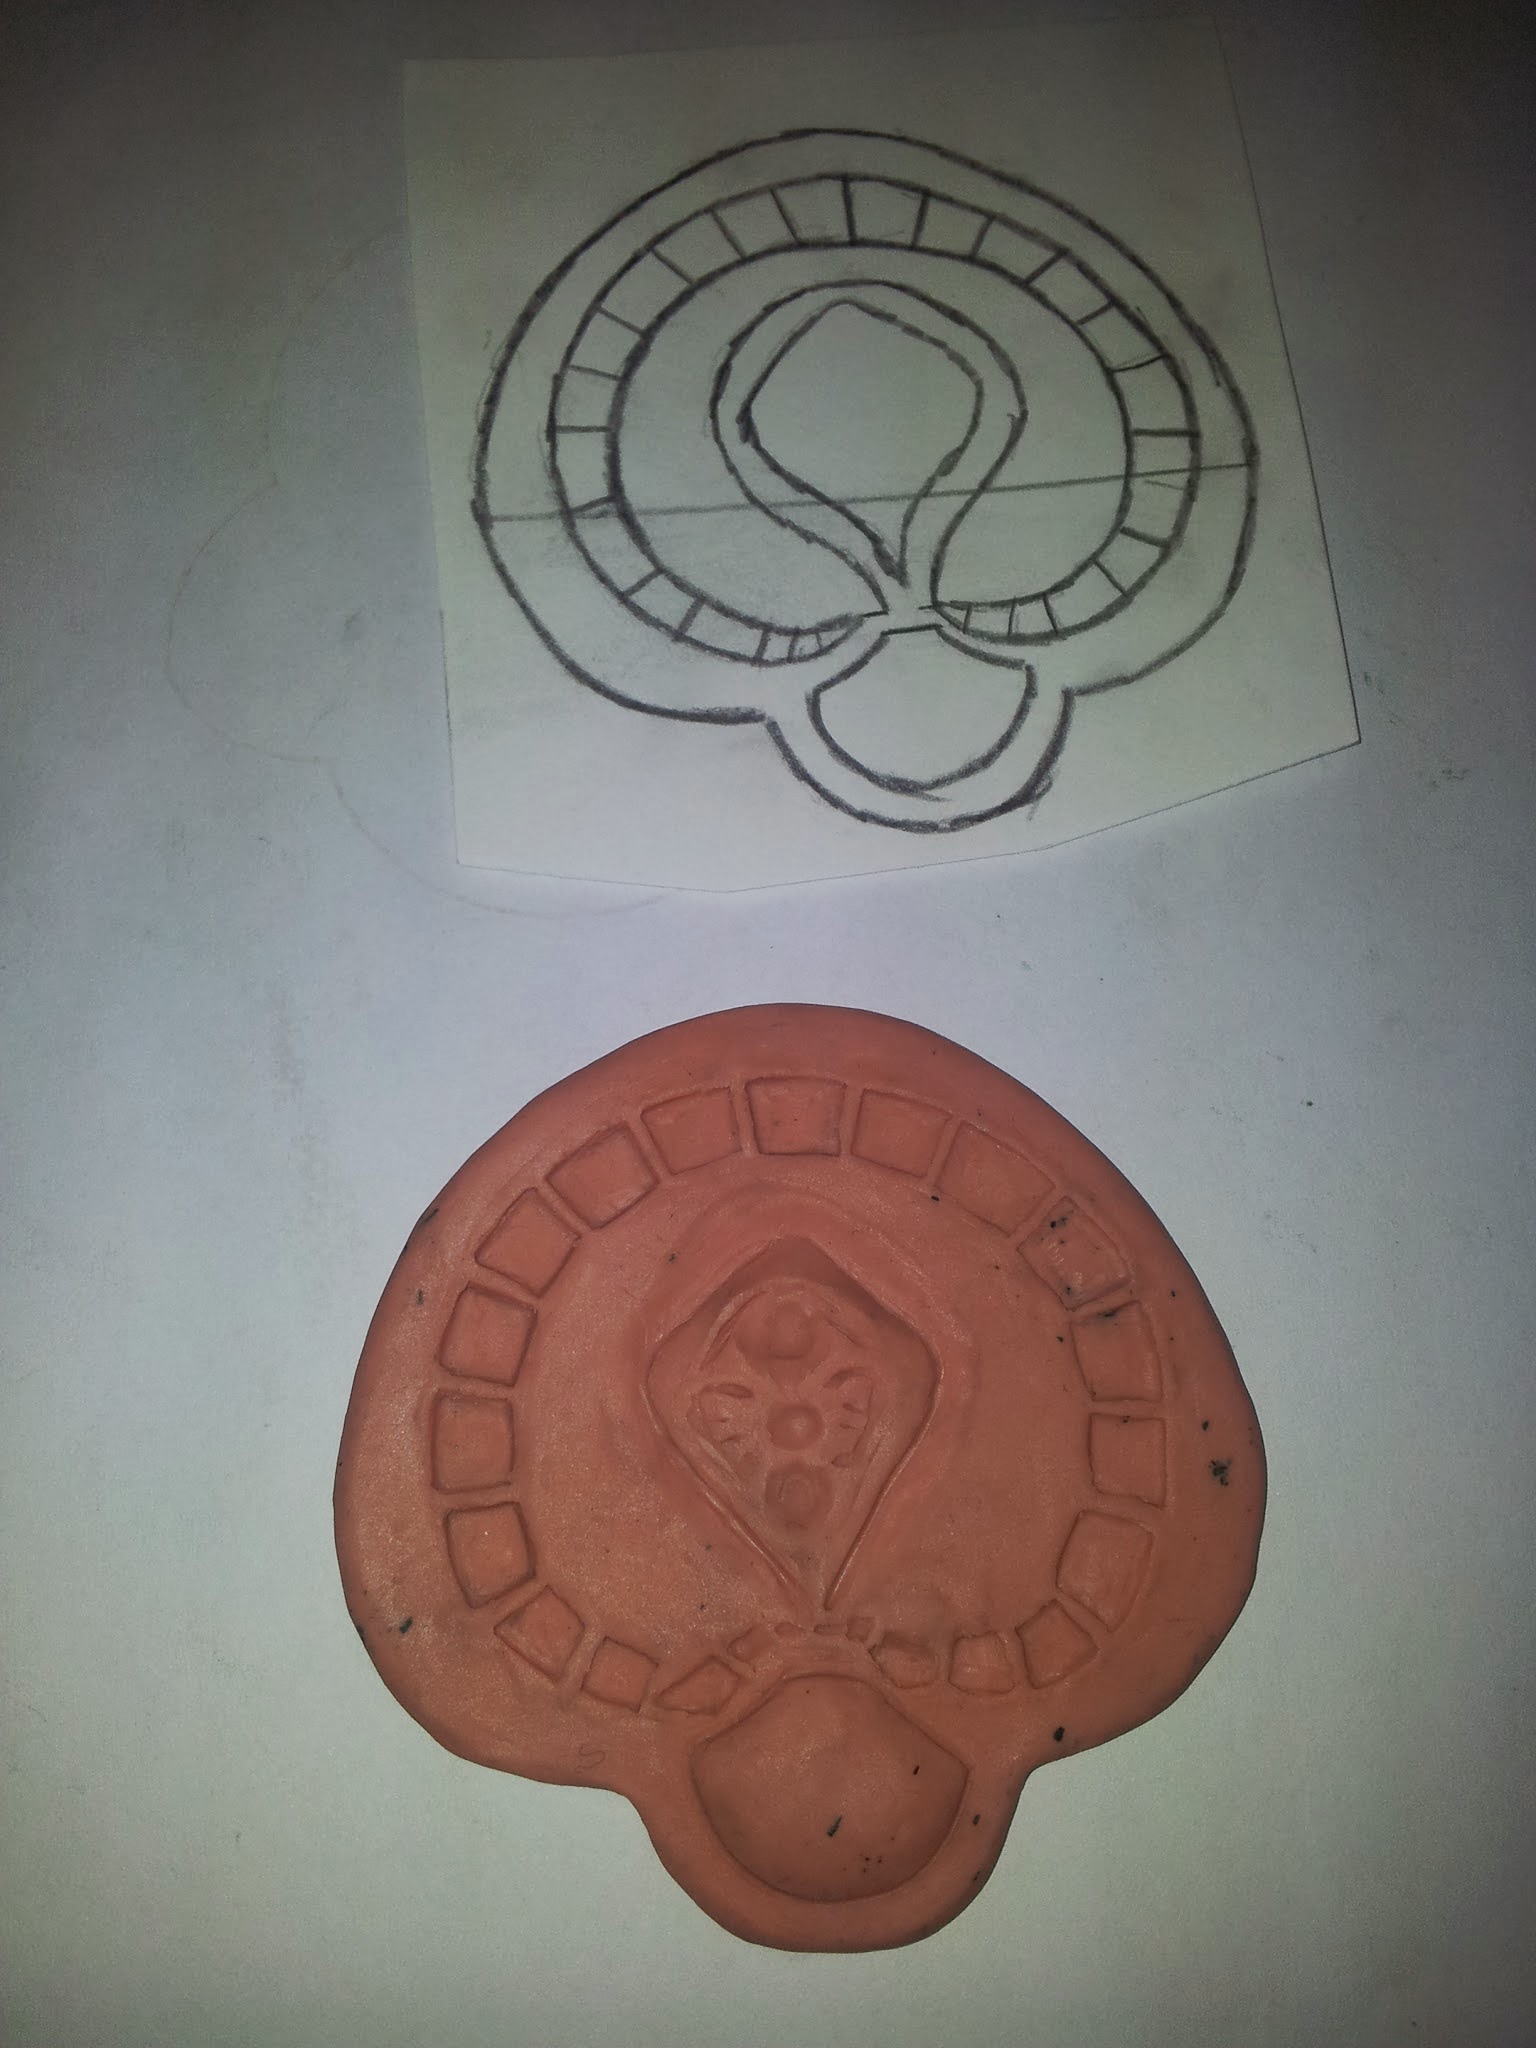
The first thing I did was remove the pattern from the base of the necklace by wrapping the neck area with masking tape and drawing its shape on top.
In this first photo, apart from seeing a preview of the PVC pieces, you can see the pattern resulting from one half in masking tape and then replicated in cardboard to complete the shape. The cut was made on the back of the necklace; But, since Morrigan doesn’t have any type of connection behind her, I ended up placing the opening of the collar on one side so that, once the entire cosplay was on, the hood would conceal it.

I overlapped two sheets of Worbla (only one is too thin and flimsy), laid out the pattern, and heat shaped it to fit my collarbones.

With the base prepared, I made the elongated pieces that run along the entire structure using 2mm thick PVC foam.
I drew all the pieces in pencil and cut them one by one with a cutter and pain.


I glued them with two-component epoxy glue. According to my verifications, this glue is so good it deserves its own cult. Within 5 minutes of applying it the piece is fixed and in 24 hours becomes molten rock.


Since I made all the pieces of the same length and the necklace has parts that are wider and narrower, after the glue dried well, I cut off the excess of each piece with a cutter so that they were equal in height and avoid them sticking in my jugulars.


We move on to the medallions and ornaments.

I took a small drawing, tracing directly from the screen because I’m that splendid, with the basic shapes of the central medallion and reproduced it in plasticine along with the other two circular ornaments on its sides.
 |
| Testing the proportions. |
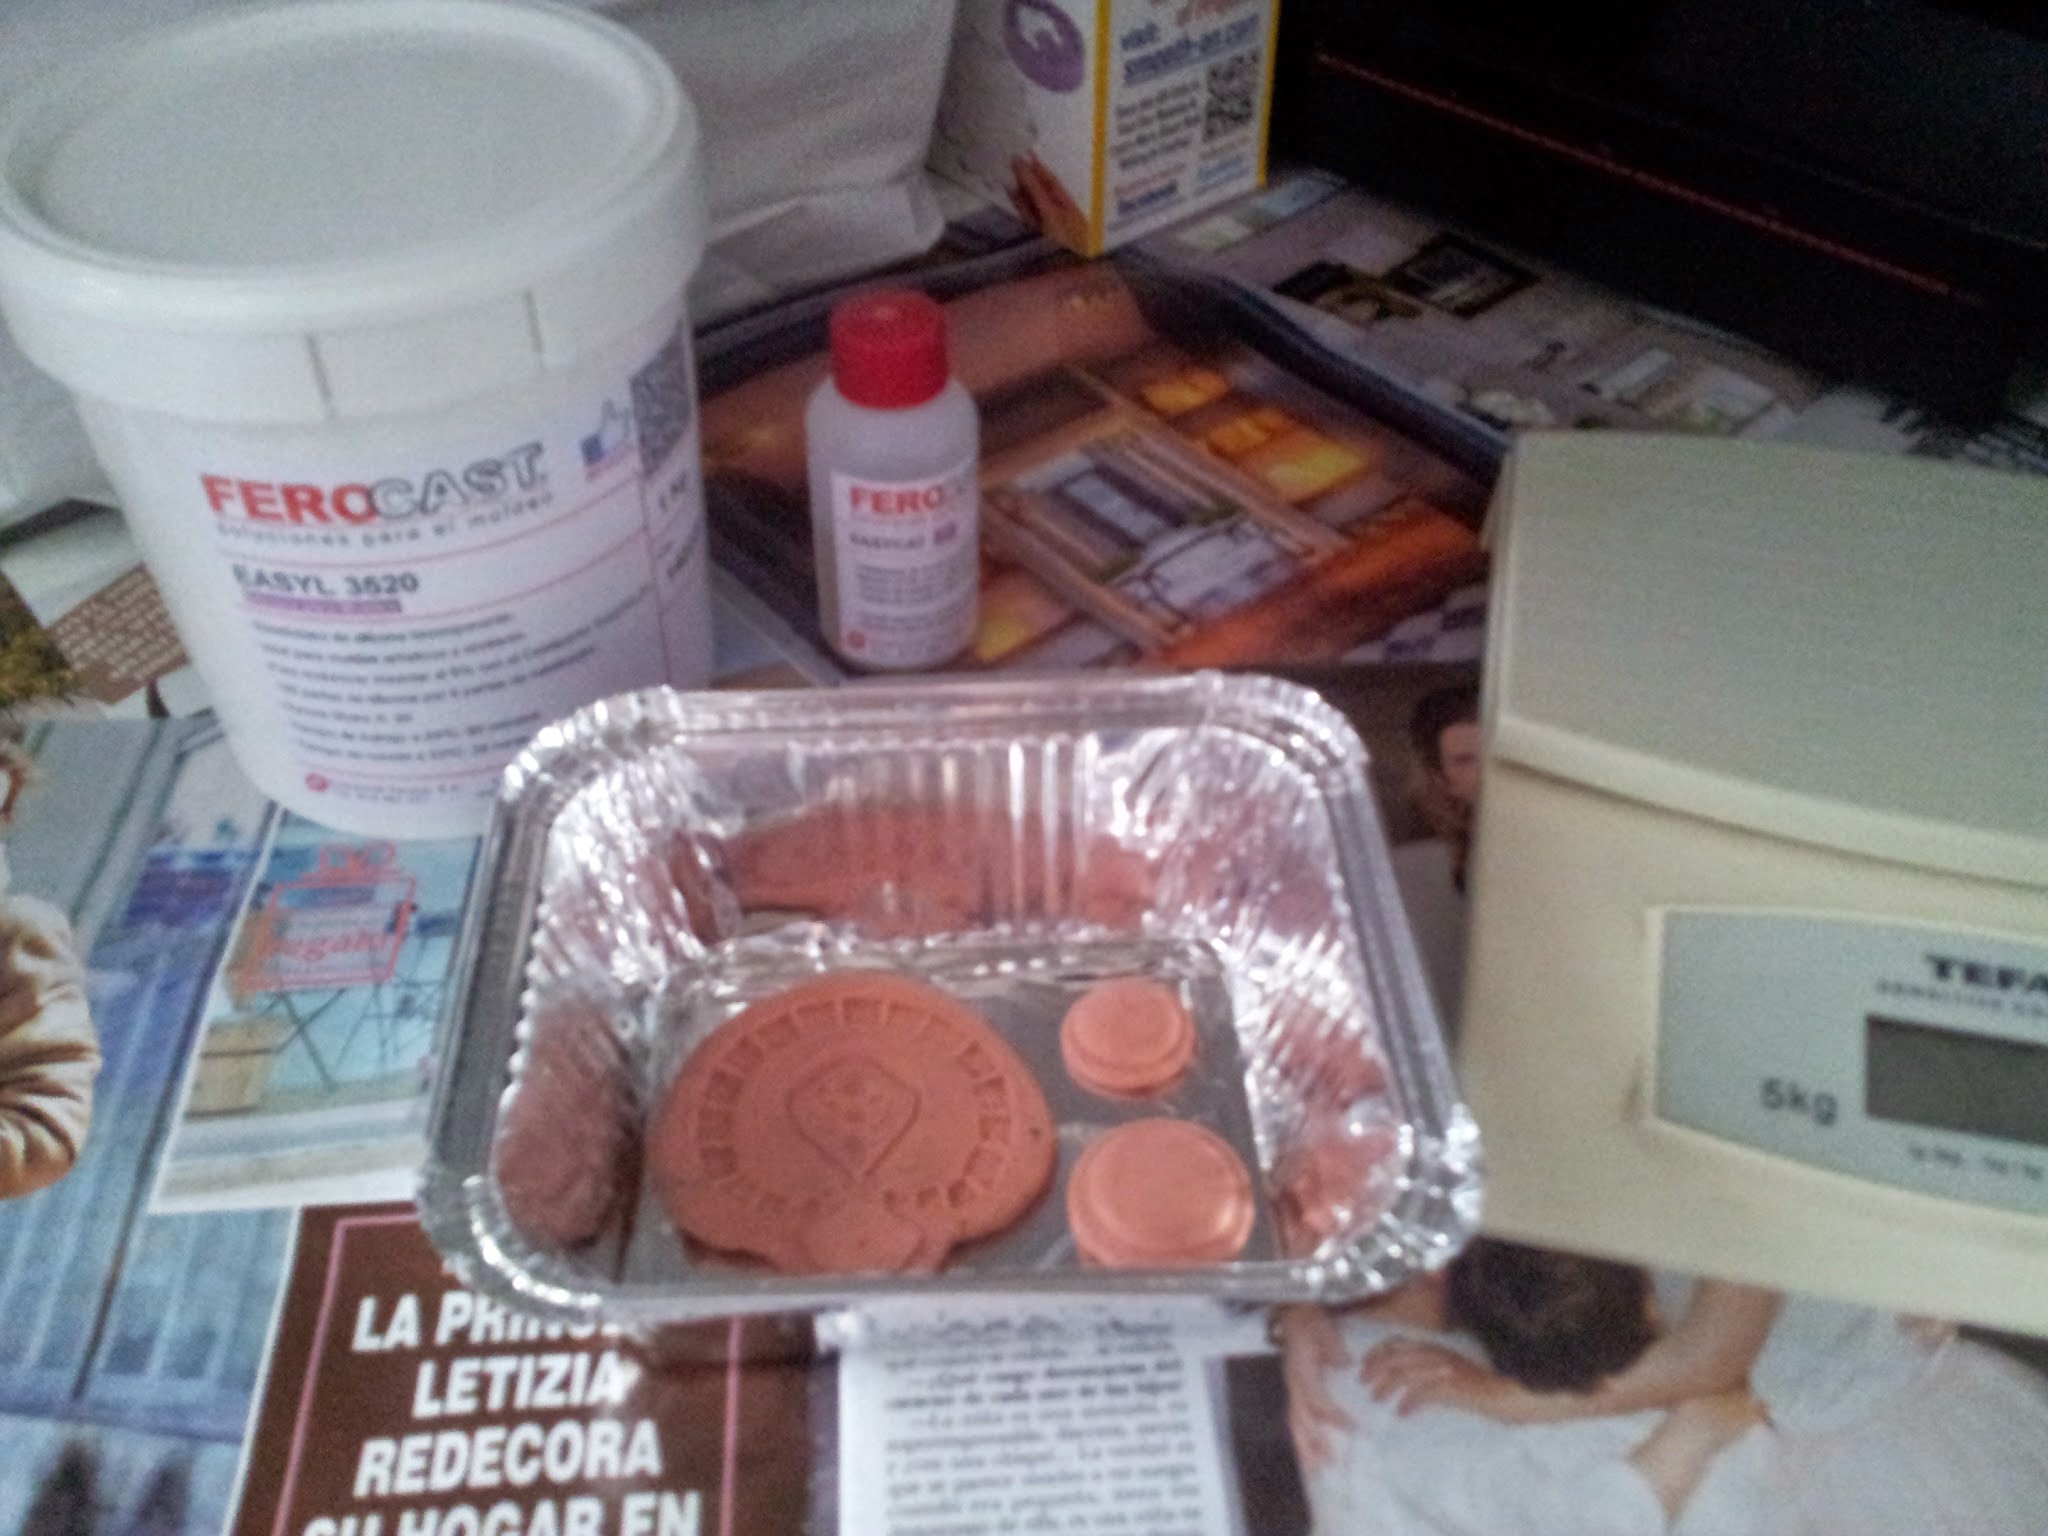
I placed the three pieces in a container and made a mold using silicone “EASYL 3529” from Feroca . It is the cheapest they have (with VAT and everything costs about €20 per kilo). In the store they warned me that it is not useful if you want to make pieces with many details and small reliefs, but for this necklace it has worked very well.
 |
| Lasagna. |
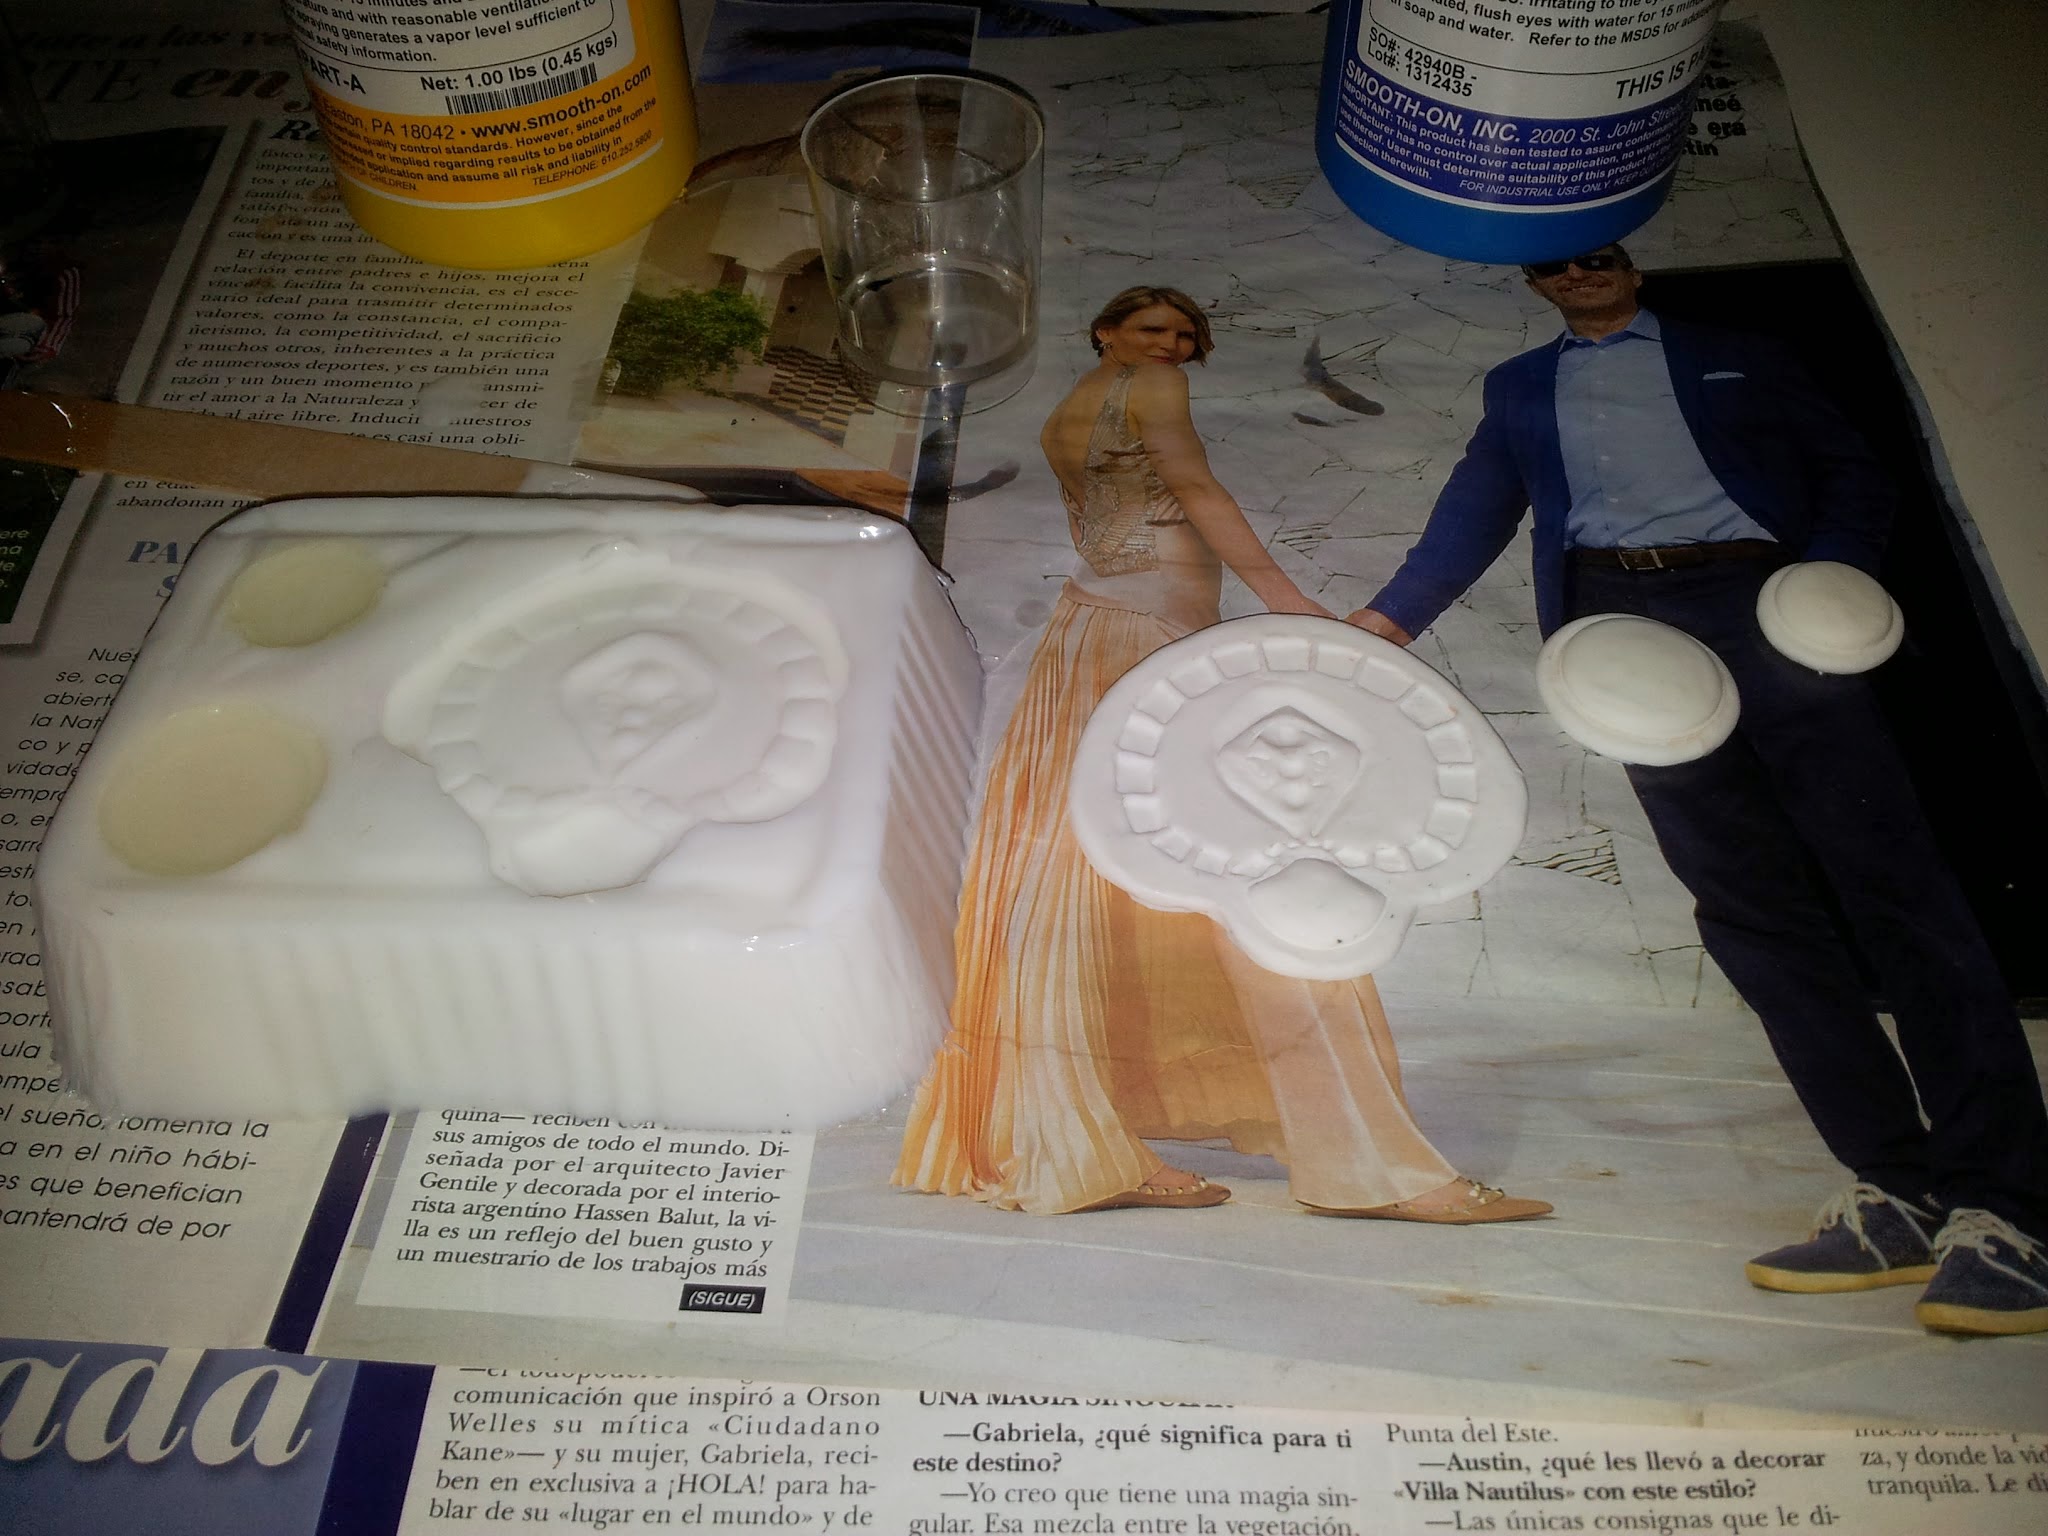
I waited 24 hours and, when I had the mold ready, I proceeded to reproduce them in Smooth-Cast 65-D polyurethane resin. A product that serves both as a primer if applied with a brush (as I explained in the Garrus armor tutorial ) and for casting very light pieces. An invention. .

 |
| “For children there are only benefits” |

 |
| Done! |
To finish the decorations, I made some warm and delicious Worbla churros.

In the photo below you can see the opening on the side to which, in the end, I attached a Velcro to close the collar.

I glued the medallion and ornaments with two-part epoxy glue once again.
 |
| Don’t you feel a kind of excitement when you see the unpainted props? I do. |
To finish it, I first painted it with a mix of brown and metallic black acrylics.

And I gave it the golden effect with Mayco “Touch ‘n Glo” brand wax applied with a small brush in small strokes and applying more or less emphasis as I was interested in some parts (they are little bottles like these). I love this product for old metallics because it looks very realistic. It is not the typical flat and meaningless color that acrylics give. Hey, these are wonderful for painting as a base, but, in my experience, you need to apply five hundred coats to cover the surface and it becomes very ugly. In addition, to achieve this type of finish, since they are so liquid, they are a little difficult to control. I much prefer these waxes that adhere in one go and allow me to give “hardcore” finishes.
As a final detail, I added the pearl necklace and attached it behind the structure by pressing the excess cord with pieces of incandescent Worbla.

This collar looks very flat in game and I don’t like it at all. In the concept arts you see more voluminous pearls, so I preferred to copy those references. The truth is that I have taken many ideas from the for my suit because the game model is much simpler and bland in some aspects such as the abundance of feathers, details and some volumes. Even the makeup in the original art is quite a bit more appealing to my taste.
 |
| ¡Spoiler! |
And that’s all. I hope you have been useful!
If you have any questions or concerns, you know: in the comments below, facebook , twitter , etc.
. .


