Cuando decidí intentar mejorar el cosplay de Tali, me planteé que podría hacer el mono en condiciones y cambiar un par de detalles. Y es muy gracioso porque son cosas que hacen que esta prenda se vea casi exactamente igual que la antigua, solo que yo sé que están mejor hecha, cosa que me hace sentir un orgullo infinito.
When I tried to improve my Tali cosplay, I thought I could make a proper catsuit by changing a couple details on it. And it’s funny because they are details that doesn’t change dramatically the way it looks with the difference that I know it’s much better made. And that’s what makes me feel proud of this cloth.
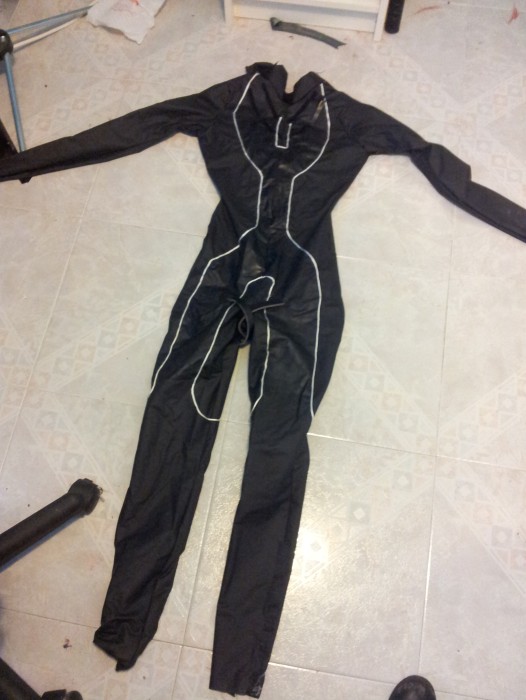
Aquí podéis ver cómo hice el primer mono. Lo que hice fue sacar los patrones de mono un poco a lo bestia, poner pinzas y costuras innecesarias, hacerlo todo del mismo tipo de tela, pintarla encima de mi y poner el cordón blanco entre pegado y cosido todo muy malamente. Vergüencita me da; pero me vino bien hacer ese “protomono”, ya que me sirvió para hacer lo más difícil en una prenda tan ceñida y con tantas piezas como esta. El “protomono” pasó a convertirse en patrones para el mono definitivo.
Here you can see how I made my first Tali catsuit back in 2011. I made the patterns very roughly, with innecessary darts and seams, I made it using the same fabric for all its pieces, I painted it while wearing it, the white ribbon is glued to the fabric and it was all really bad sewed. I feel ashamed of that poor work. But that horrible work was useful for me to make the second one. I dismantled that catsuit in pieces to obtain the patterns for the new one.
He aquí el primer mono, en el suelo, temeroso, listo para ser diseccionado. Pasé miedo.
So here you can see the first catsuit, on the floor, ready to be taken apart. I was scared.
If you want to make a catsuit with different pieces like this one from scratch, you can wrap yourself in duct tape, make someone draw the pieces on you and then cut it out to obtain your pattern. There are plenty of tutorials in youtube!
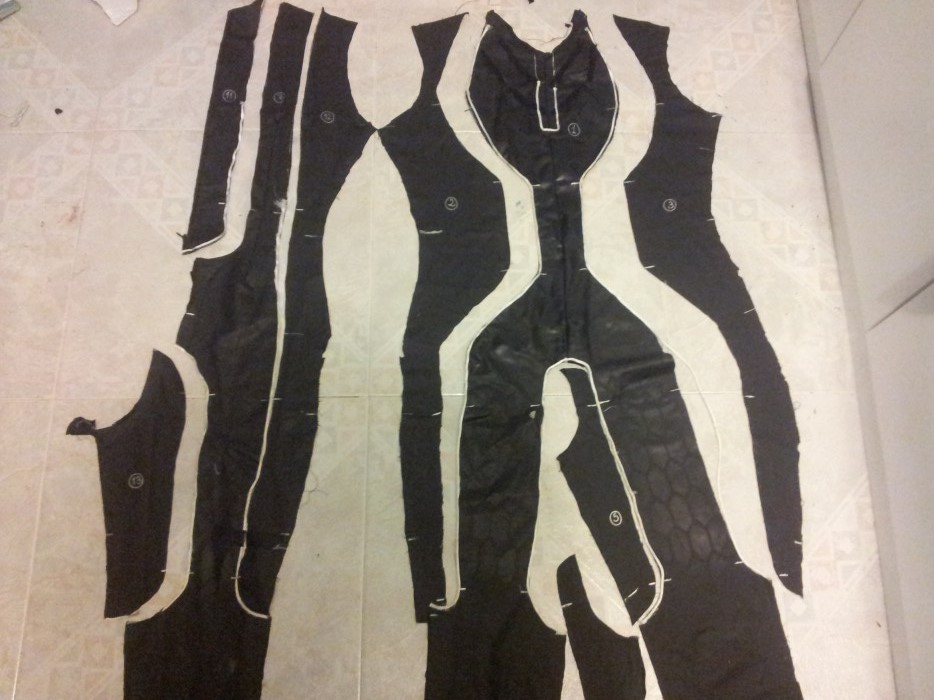
Lo corté por los laterales, le quité la cremallera de atrás, dejé la espalda dividida y numeré las piezas que lo componían para no perderme en el proceso.
I cut it on its sides, I removed the zipper, I divided the back in two pieces and I numbered all the pieces to avoid getting lost in the process.


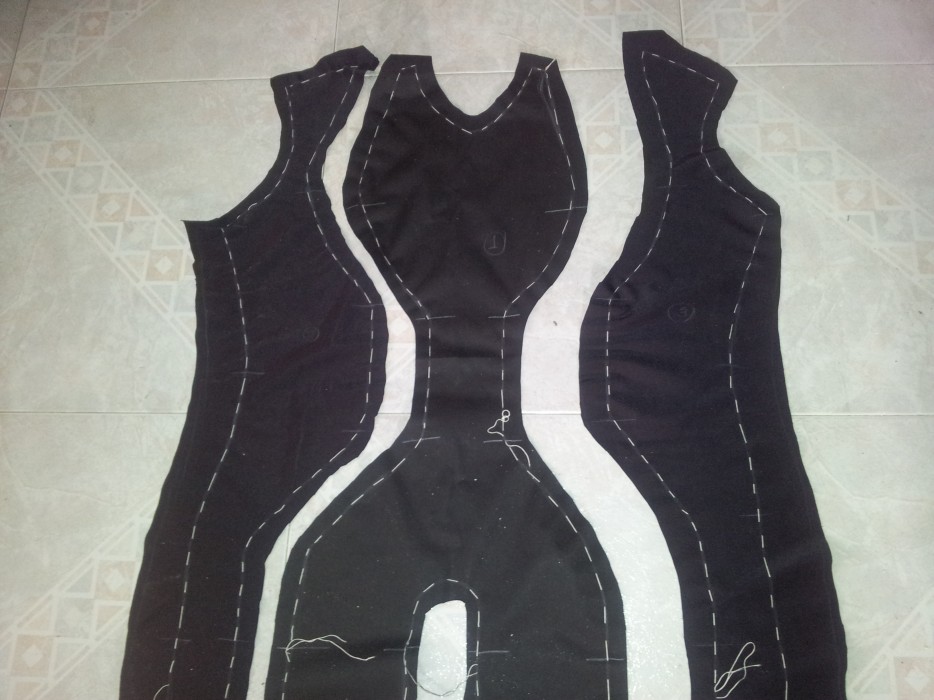
Separé todas las piezas con mucho cuidado e intentando que las formas quedasen lo más limpias posibles para que, al pasarlo y volver a juntarlo, quedase lo menos deforme posible.
I cut out all the pieces very carefully to avoid getting deformed patterns.
Pasé los patrones resultantes a las telas nuevas: vinilo negro brillante para las partes con hexágonos y vinilo negro mate para el resto. Como el lápiz blanco para marcar suele irse borrando e iba a sobar las telas bastante, pasé hilo de hilvanar por todos los contornos para que se viera bien la forma de cada pieza. Además, eso me vendría bien para unirlo todo, ya que es mejor ir uniendo las telas al tacto siguiendo el relieve del hilo que mirando y dándole vueltas cuando sólo están marcadas a lápiz (trucazo gratis que os acabo de confesar).
I drew the new patterns on the new fabrics: black glossy vinyl for the exagonal decorated parts and black matte vinyl for the rest of the catsuit. As the white pencil usually gets whipped off while manipulating the fabrics, I basted the shapes to see each piece clearly.
In addition, that would be helpful for me to assemble all the pieces as it’s easier to sew them together touching the relief of the thread, than only seeing its trace.


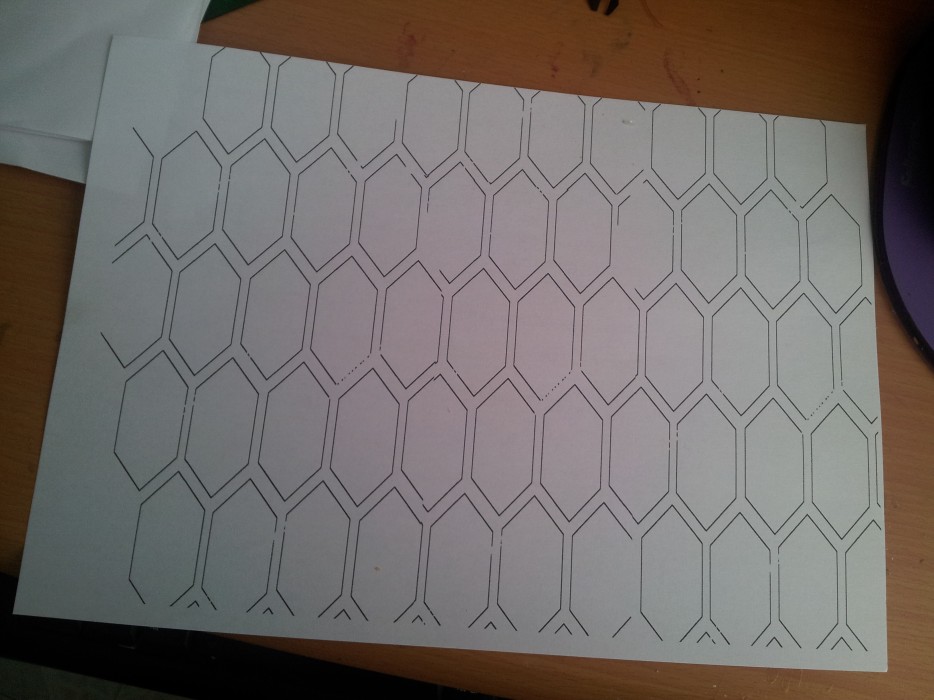
Imprimí una plantilla de hexágonos, la pasé a un plástico cutre (una funda para folios) para pintar sobre el vinilo brillante con spray mate negro también. La verdad es que para estas cosas soy un poco cagada. Podría haber utilizado un gris oscuro para que se notase más. Luego lo agradecí porque los primeros hexágonos que hice me salieron churretosos perdidos; pero creo que hubiera ganado “molaridad” con un tono un poco más diferenciado del fondo.
I printed an hexagon stencil, I drew it on a thin plastic sheet to paint over the shiny vinyl with a matte black spray paint. I could have use a dark grey paint, but I was afraid the exagons were going to be very flashy and I didn’t want that kind of dramatic effect. So, though the hexagons are not very noticeable, I’m eventually happy with the result.

Después de hacer los hexágonos, empezó lo verdaderamente bueno: unir todo. Y no sólo eso, sino que quise unirlo incluyendo el maravilloso y novedoso (para mi por lo menos) cordón forrado con bies. ¡¡¡Chaaaaan!!!. ¿qué cojjjjj**** es el cordón forrado con bies?. Pues mirad, yo estaba segura de que quería rehacer este mono añadiéndole el cordón integrado entre las costuras, tan típico en prendas deportivas, tan elegante y tan dominguero a la vez. Creo que el mes anterior habían hablado de alguna técnica parecida en La Vida en Cosplay, lo busqué en Google (buscar en Google mola y sirve para cosas) y encontré este magnífico a la par que sencillo tutorial en el que explican cómo hacerlo y ponerlo. Y me animé a ello.
Bies con cordón, cordón con bies, bies con cordón, cordón con bies.¡Qué mareo! Fui a la mercería, compré cinta al bies blanca y cola de ratón (el cordón) blanca también (aunque el color de este último da igual porque no se ve) y me lié a integrarlo todo en una única y maravillosa estructura costurera.
After painting the hexagons, I put all the pieces together. As I wasn´t happy with the way I attached the white ribbon in my last catsuit, I decided to sew it as a piping (a ribbon wrapped in bias tape integrated as a part of the seams).

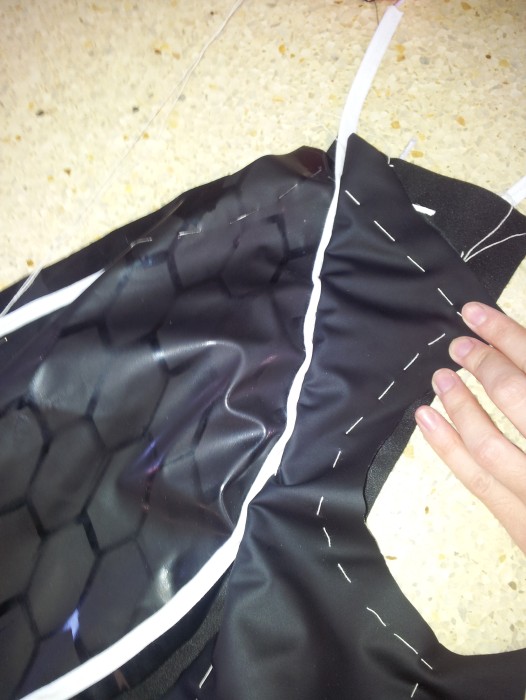
Empecé hilvanándolo a unas piezas y después lo hilvané uniéndolo a las piezas que faltaban para, por último, pasarlo todo a máquina. Unir con alfileres y luego hilvanar dos capas de vinilo con el algodón del bies en medio e intentando que saliera justo el cordón a lo largo entre las dos costuras fue un árduo trabajo de cuyo resultado, ya que era mi primera vez haciendo esto, no puedo quejarme.
I basted this piping in some pieces and then I basted those pieces together with their corresponding pieces. It was a hard work to put everything together with pins, basting it and finally machine sewing it. It was my first time assembling a piping and I’m happy with the result.


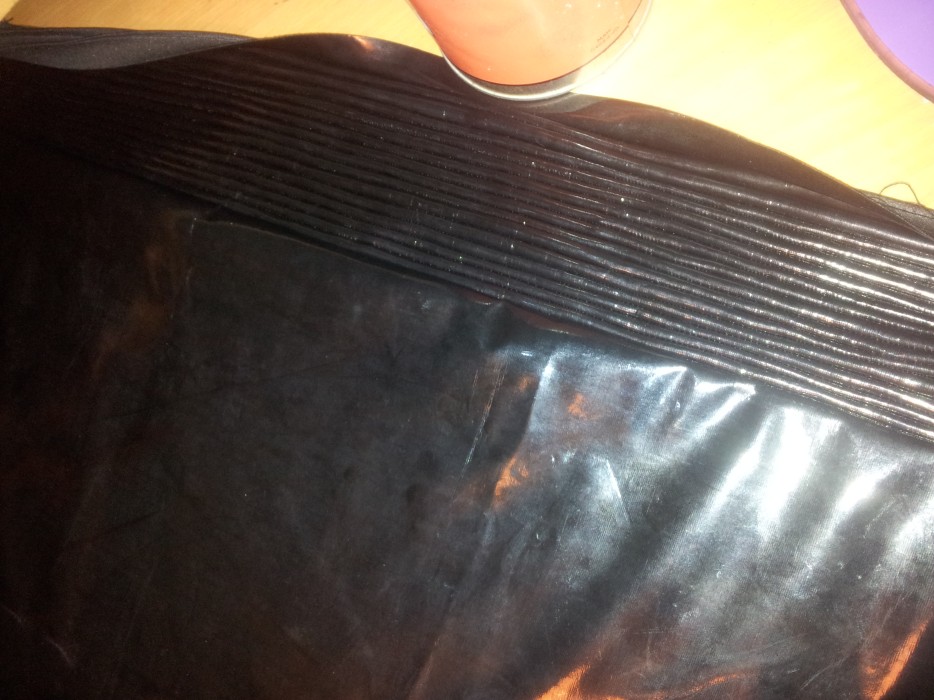
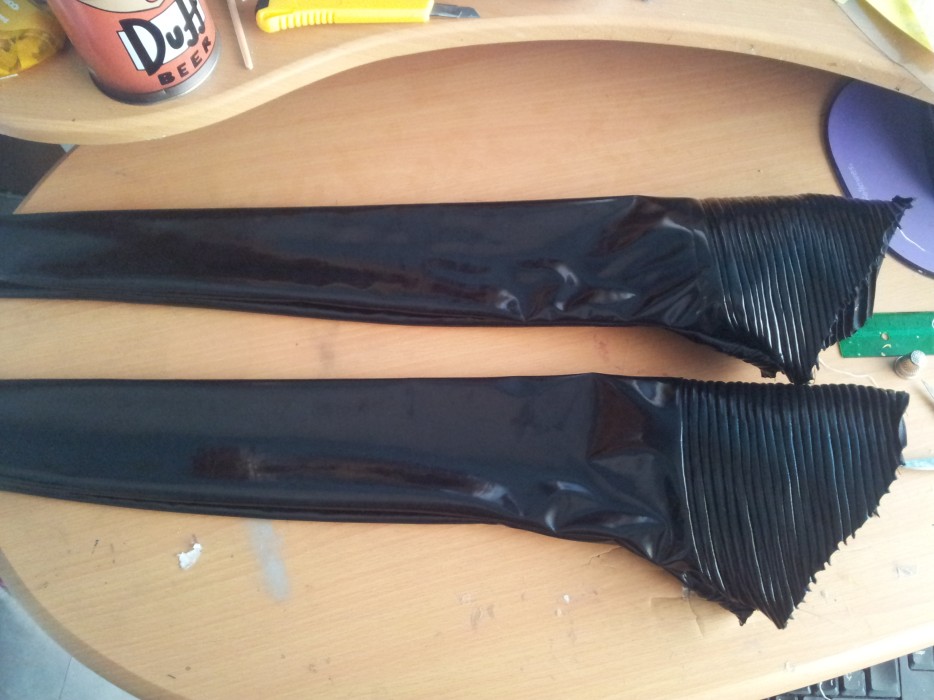
Una vez montado el mono, me puse con las mangas. Otra de las cosas que me repateaban del mono antiguo es que las mangas eran lisas por arriba y ¡¡¡nooooooo, no son lisas, son estriadas!!! (¡hombre, por Dios!). Cogí un pedazo de vinilo brillante, marqué un montón de líneas paralelas a una distancia de medio centímetro y las fui uniendo entre si con la máquina de coser, (empecé hilvanando, pero me aburrí, así que tiré de máquina directamente). Uní las piezas estriadas al resto de las mangas. Igual que con el mono, saqué los patrones de las mangas copiando las antiguas para que me quedaran igual de ajustaditas.
Once the catsuit was assembled, I made the sleeves. I also hated my old catsuit sleeves because they were flat on their upper side and they had to be grooved!
I took a piece of shiny vinyl, I traced a lot of parallel lines at 0,5cm distance and I sewed them together to get that cool effect.
I also used the old sleeves as patterns for the new ones and I made some alterations to add this new grooved piece.
Uní las mangas, le puse el cuello y añadí la cremallera de la espalda.
I assembled the sleeves, I added the collar and the zipper on the back.
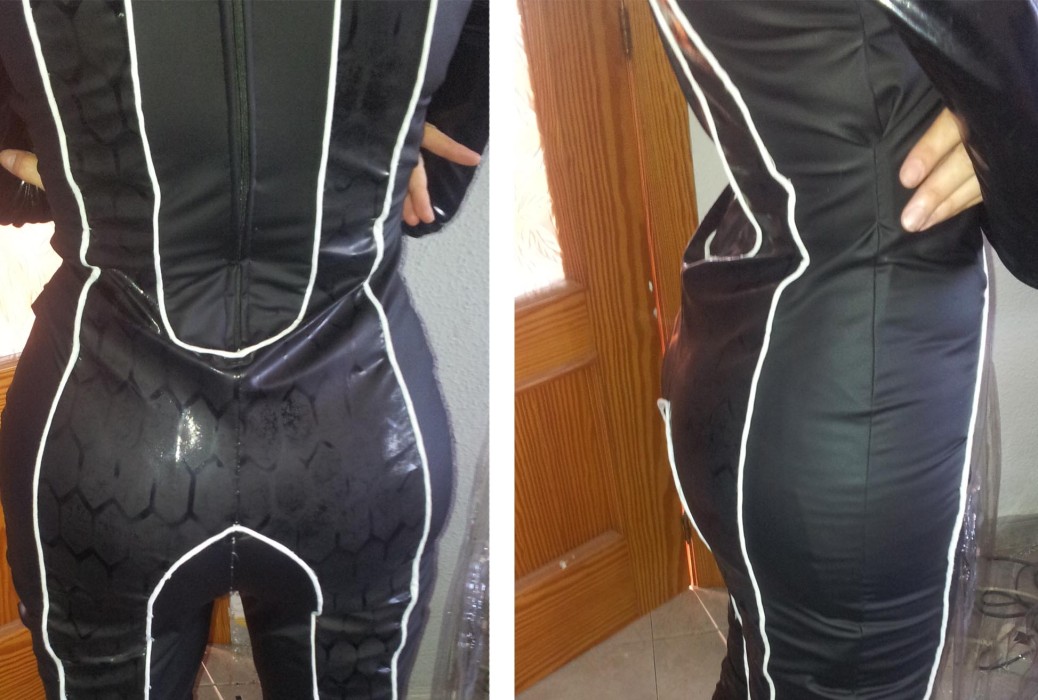
Pero eso no es todo; como muchos de vosotros sabréis (por mis múltiples y entusiastas twits), me compré un culo en el pornochino® y me hice unas caderas de espuma porque sentía (tras leer varios comentarios al respecto en mis fotos) que para conseguir la figura de Tali necesitaba un poco de ayuda extra. Y la verdad es que para otros personajes eso me da un poco igual, pero las caderas quarianas son por un lado muy identificativas y, por otro, fáciles de emular. Con lo que decidí hacer caso a los trolls/amables críticos y me pareció una buena idea darle ese toque.
And now it comes the funny part. I bought a fake bootie and I made a couple foam pads for my hips as the quarians have this particular fat ass shape. I received some comments on my old costume “complaining” about my flat ass so I listened to those trolls/costructive critics and I made this magnificent idea come true.
Quería hacer lo mismo con las piernas y meterle un poco de relleno a los gemelos, pero me pasé cosiendo las piernas del mono y lo dejé tan apretado que ya no pude meter nada de relleno.
I wanted to pad my calves too but I sewed the leg parts very tight and I couldn’t fix it to add the foam inside.
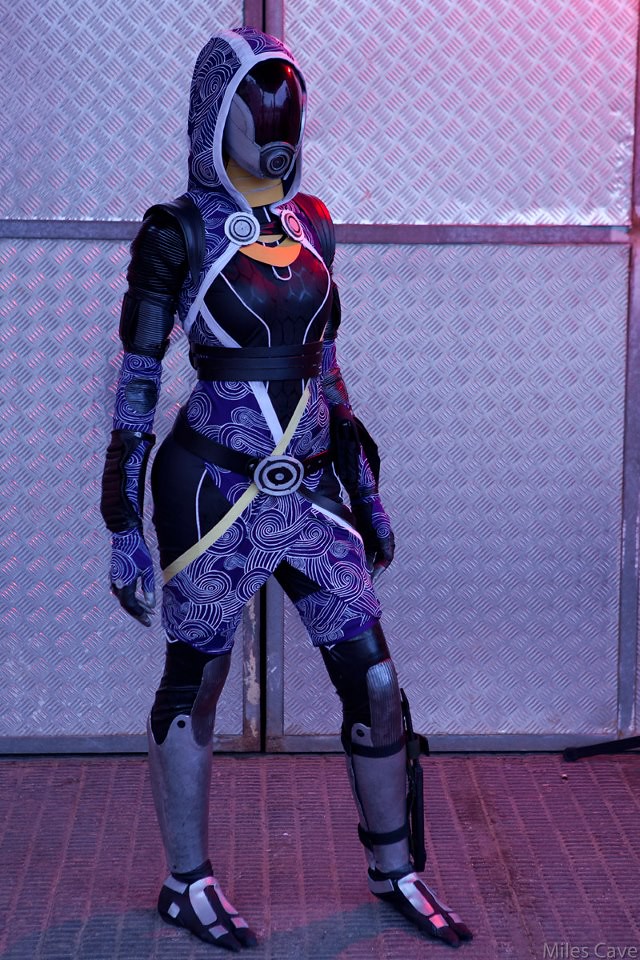
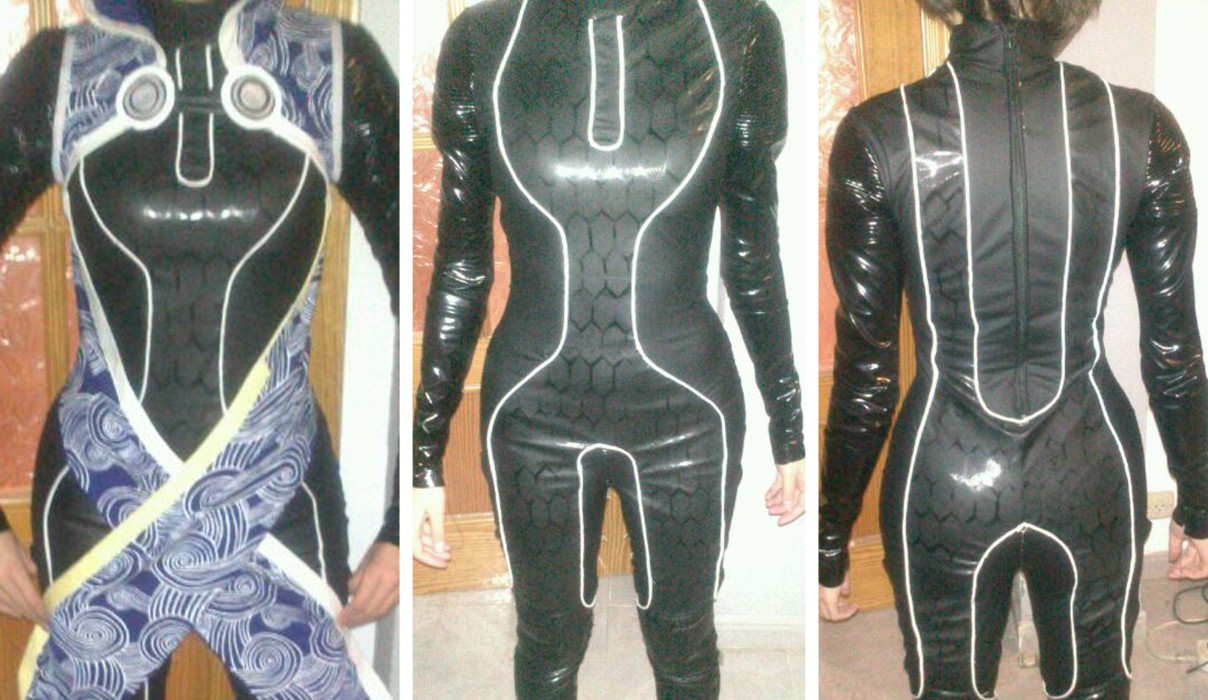
Y así es como quedó en conjunto y con la tela estampada por encima:
Here you are the result:
Y con esto terminé el mono. En total tardé unas dos semanas en hacerlo. Sobre todo me dio mucho trabajo hilvanar y unir todo a mano, probármelo y cerrar las costuras entre piezas que llevaban bies. Luego el trabajo a máquina fue bastante más llevadero y, por suerte, me quedó bien a la primera porque tenía mucho miedo de destrozar un mono para que el siguiente me quedase mal, pero salió todo como esperaba.
It took me two weeks to make this catsuit. The most tedious part was basting the ribbon. As always, the sewing machine work was way more bearable and I luckily made it on the first try. I was very afraid of making this catsuit even worse than the first one, but everything came out smothly.
Próximamente os contaré cómo modificamos las perneras y con eso ya terminaríamos las explicaciones sobre Tali.
Gracias por leer.


Eres la pera limonera. Vaya trabajazo te has marcado! Tu sabes que el bies con cordon se llama vivo y lo venden hecho. Cuando hice el tuto no lo tenia claro, eso. Buenisimo un beso
¡Muchas gracias! Tu tutorial era justo lo que necesitaba para hacer este disfraz como quería, me vino de perlas. Y me apunto lo de vivo para la próxima vez 😀
Perdón era ¿cordón bies? ¿bies concordato? ¿cordón al bies? XD Te ha quedado chachi nena 🙂
Hala como mola!! *___* Es magnífico!!
Image links are broken =(