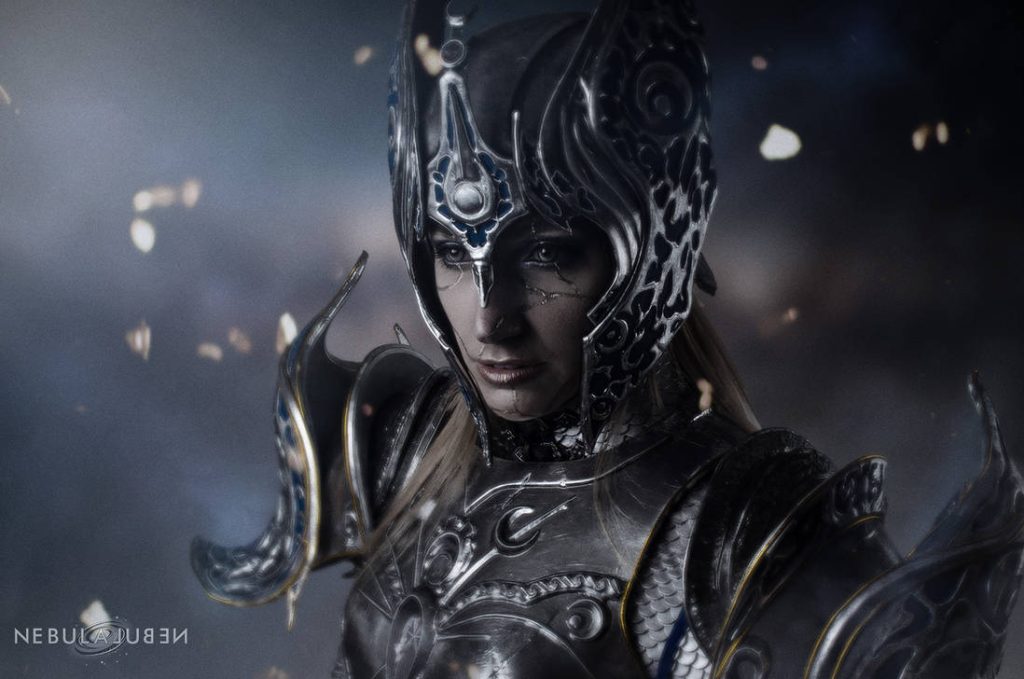
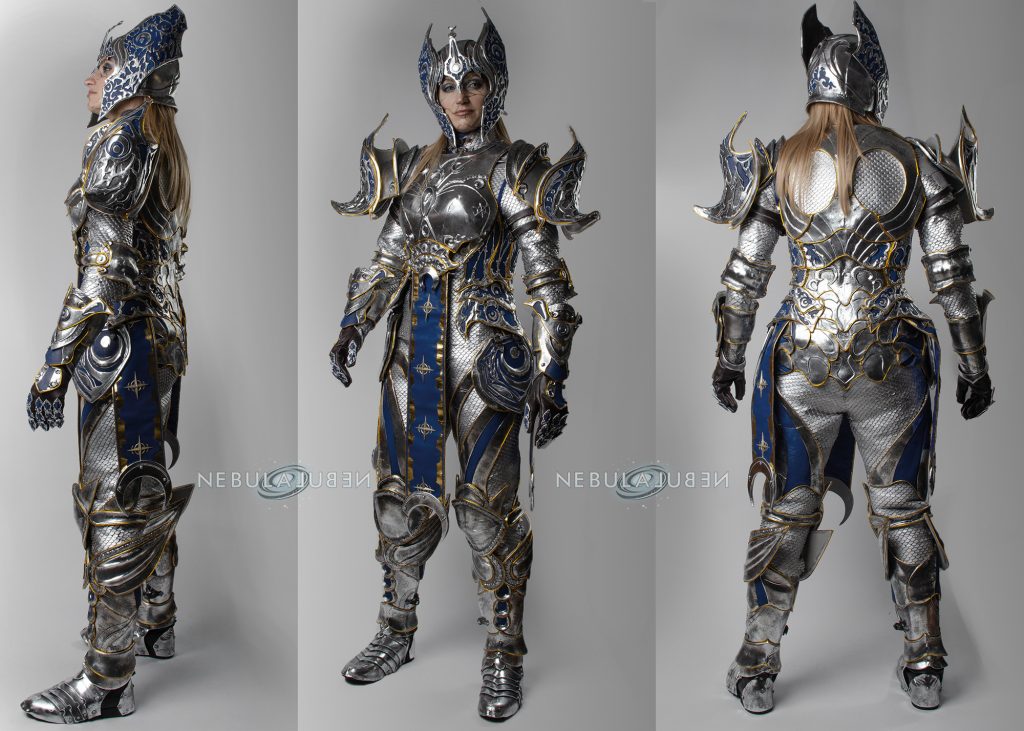
Hello! Today I’m going to show you how I made my Dame Aylin (a.k.a. Nighsong) costume from Baldur’s Gate 3.
Oh, this character was love at first sight. The moment this woman did her Sailor Moon transformation and I saw her armor, wings and humongous sword, I fell in love. When she beat the shit out her father-in-law, she conquered me. When she grabbed Lorroakan and split it in half like a stick, I signed the mortgage with her. And when I saw how passionate and gently she is with her love, Isobel, I decided to spend a day in Ikea with her. This woman makes me thrill. Her design is incredible and she is the most epic person (aasimar). It’s funny I almost kill her.
We Aylin cosplayers are very lucky because there are two super useful resources out there we can use:
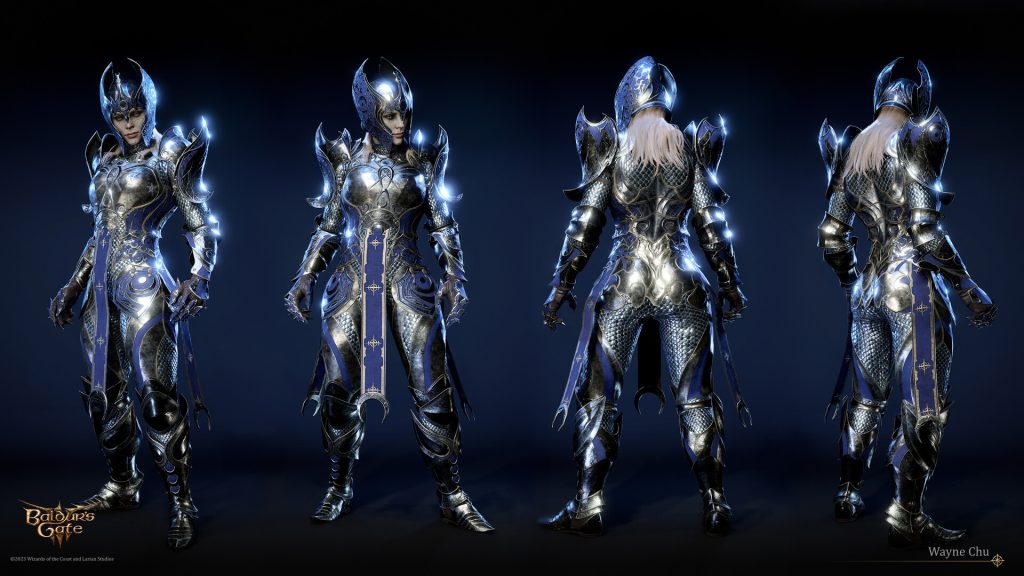
- The official concept art by Wayne Chu. I was looking to find Aylin’s concept art like crazy when, suddenly, Larian publishes in their social media, they’ve released a bunch of art on Artstation. Of course, I didn’t even blink and I jumped headfirst to the site. There it was. That was the moment I decided I was going to make the costume.
- This model by Tosyk on DeviantArt. Here you can find several files featuring the character’s textures which, essentially, match the pattern unfolding.
Craft foam, the main material.
87% of this costume is made using high density foam from Feroca and I mainly used the 5mm thickness one. You’re telling me you don’t know how to make craft foam stuff? Buy my book!
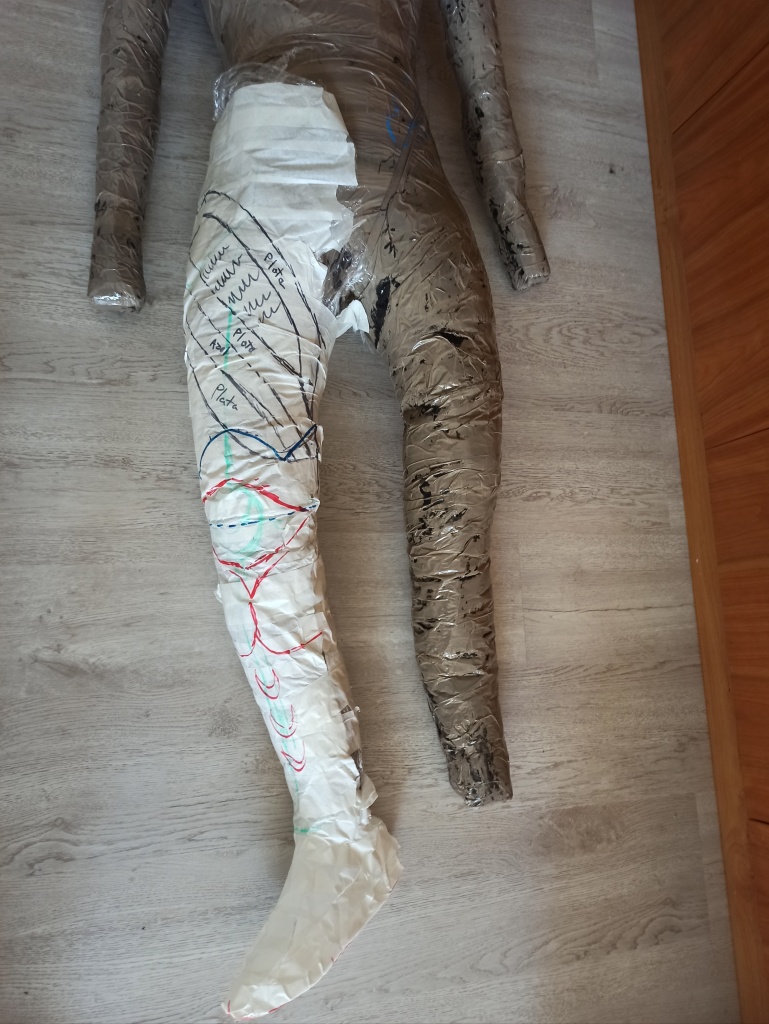
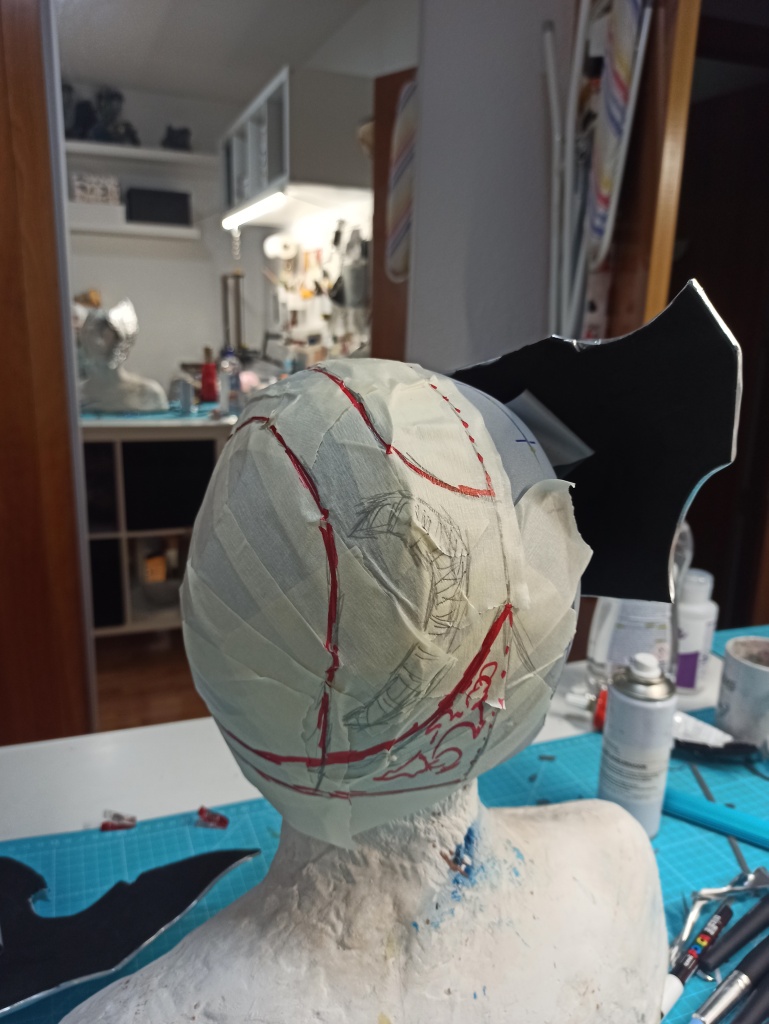
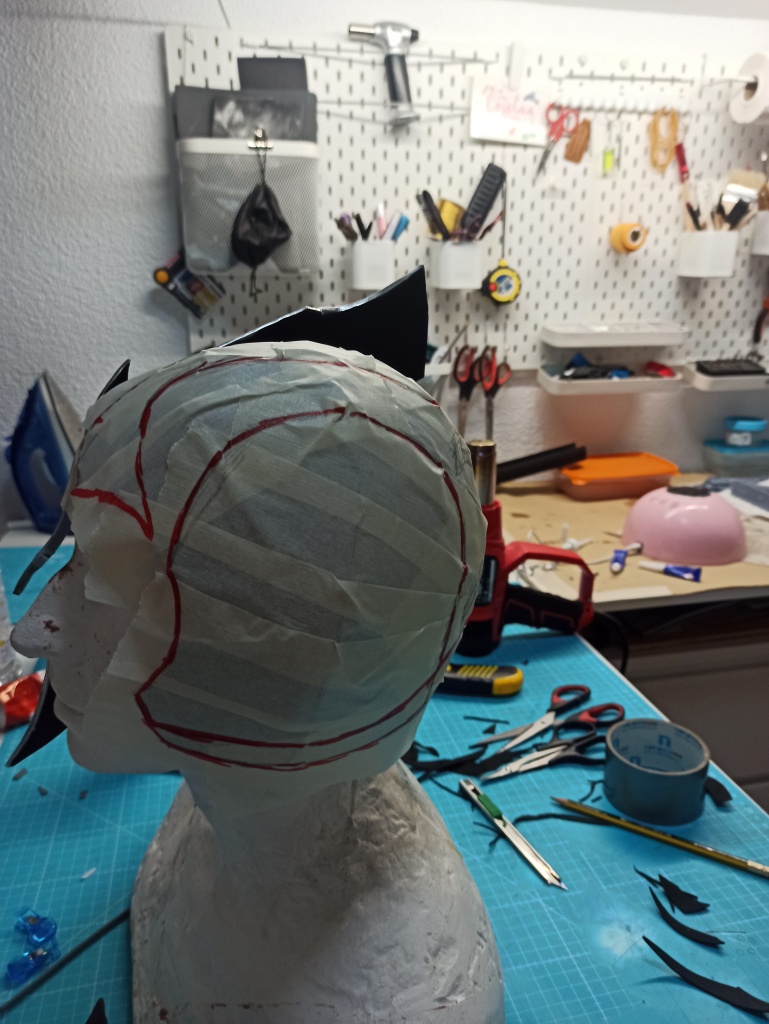
To make these patterns, I used the duct tape wrapping technique. Well, actually, I wrapped my dress form (which I made using the same technique, so this is some King of “wrapinception”) and I drew each armor part on the resulting husk.


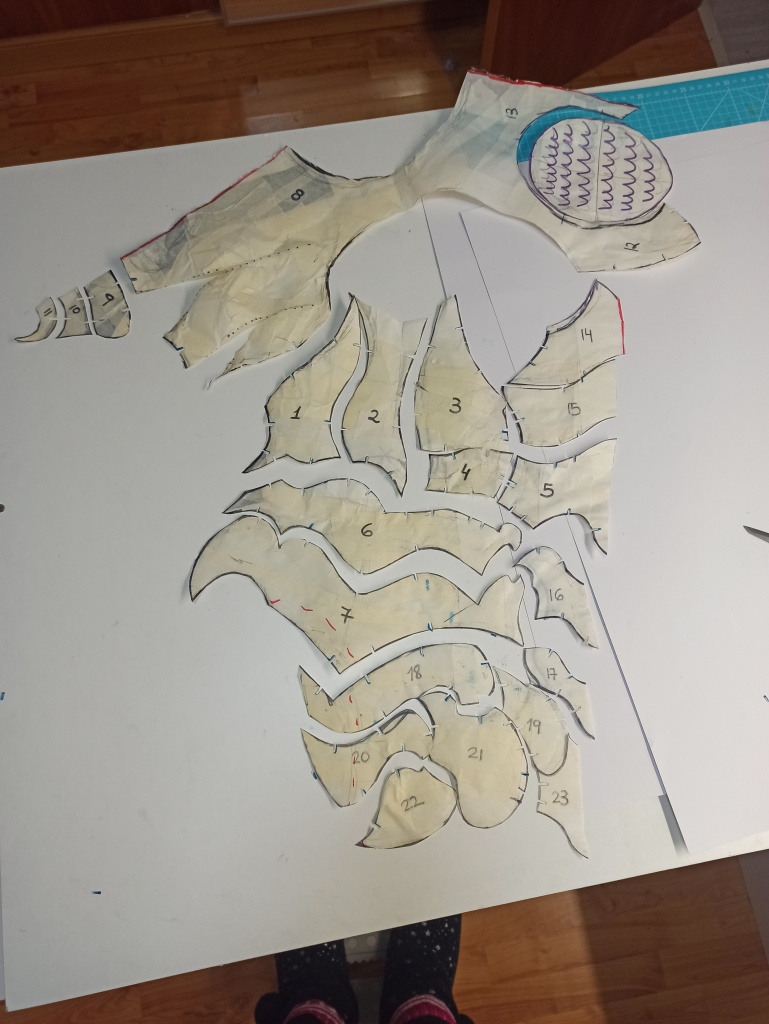

Some complicated pieces such as the shoulder pads, which shape doesn’t suit the body’s one, were made by tracing their profile. Their shape is weird, but it’s easy to pattern: I used a front and back image of them and copied both sides. This process is enough to get the desired volume. I took into account that, of course, these shoulder pads are asymmetrical. The elbow pads also have a quite intrincate shape, and I made it by unfolding them in several pieces.


I did the same with the lateral pieces on the helmet: I drew their shape on a piece of paper and adjust it little by little till I got the right shape. Just by trial and error.


Once the base elements were made, I added the 2mm foam reliefs. This time I used the texture files as a base to copy each one with Photoshop and prepare each file to be cut with my Cricut Maker 3 plotter.


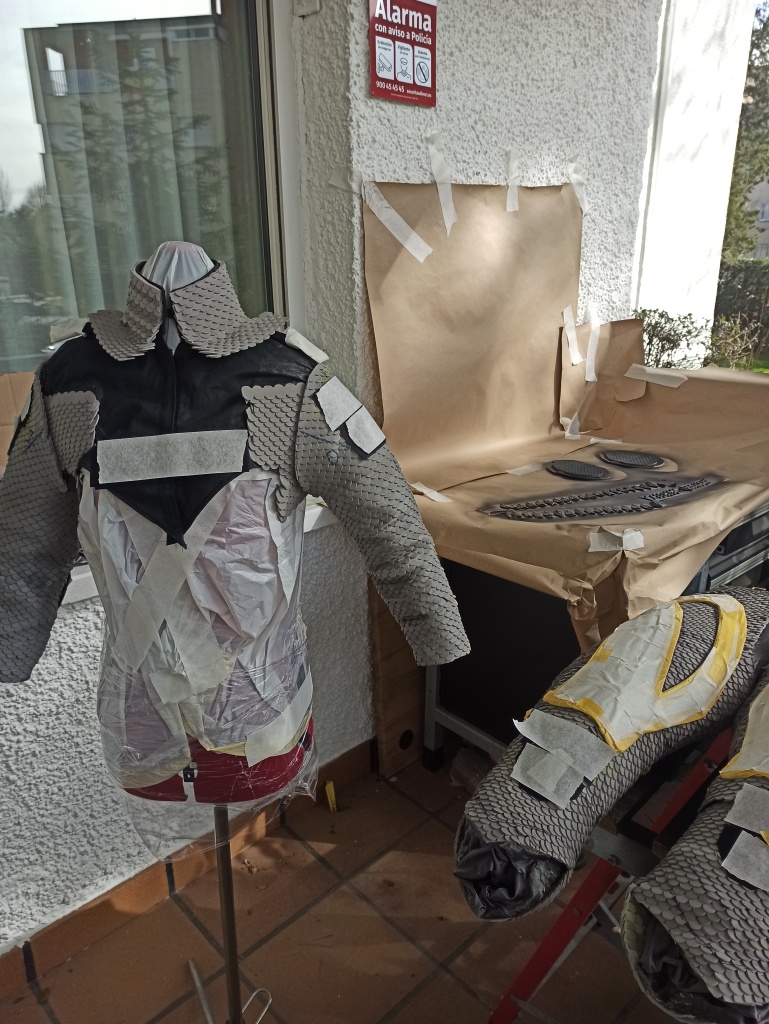
I also made the scale mail with 2mm craft foam. I designed it with Photoshop and sent it to the plotter. I don’t know hoy many scales I made!! I joined together each strap using cyanoacrylate and fixed them to the undersuit with contact cement. I’m not a hundred percent happy with this element because, as good as it looks, it’s quite stiff and limits my movement more than I’d like to. I’ll keep on trying different techniques and materials looking for something more comfortable.


Resin 3D printing
I was a big fan of filament printers and I used the SLA printer only for small details. The thing is my filament printer (a Creality CR10) was very old and started giving some problems. In the other hand, my Anycubic Photon Mono X got damaged because of a resin leak that left the screen unusable, so I took the chance to buy a second hand Anycubic Photon Mono, which doubles the previous one’s size. With these, the printing speed and the finish it gets, I chose to make all the 3d designed elements in my SLA printer, including the sword. And I’m very happy with that decision.
I designed the following elements using Fusion 360 software and printed them: armor reliefs, finger armor, ornaments, buckles and the Sword of Justice. All these 3D files are avilable in my shop.


Wrapping and finishing
Aylin’s armor has this shiny but weathered metallic look and, to emulate it, I used a silver chrome vinyl wrap. I used the Wrap Worker Series Brand from Audioledcar.
In order to wrap your costume, I strongly advise you to buy good quality vinyl. The Aliexpress ones are way cheaper, but the differences are quite noticeable. In this case, you’ll see the good quality vinyl is easier to manipulate, more heat resistant, stretcher when hot, more adhesive, less wrinkly and it’s easier to correct if so.


Once I wrapped everything up, I painted and weathered the armor using acrylic paints. As always, I highly recommend you to watch miniature painting tutorials. I especially like Angel Giraldez’s ones. To Paint this armor, I used the TMM (“true metallic metal”) technique as the vinyl wrap had this realistic look.


As you can see, I specially focused on making small details pop by applying shadows and highlights.


To finish the armor, I glued a 2mm golden trim around the edges of the armor.


I primed the scale mail with black Full-dip vinyl spray and I’d have liked to paint it using the same product, but Full-dip’s chrome paints look very different from the vinyl, so I ended up painting it with a Chrome Montana regular spray paint.


For a clean finish, I lined each piece with 2mm foam and pleather silver bias tape on the edges.
Textile elements
This costume has few textile elements, which are those three hanging clothes around the legs (I don’t know their technical name. Please, help) and the gloves. All of them were made using Antoñita Jimenez’s fabrics.
The hanging thingies were made using blue pleather and its correspondent lining I added gold bias tape on their sides and heat transferred gold vinyl for the border ornaments.


And that’s it! I hope you found some of these explanations useful! I’d like to make another post showing you how I made this armor piece by piece.
If you have any doubt, feel free to comment!


