Hello! I keep on rescuing old costumes to show you their ins and outs. Today I’m gonna show you how I made Senya Tirall from the SWTOR MMO, specifically from the Knights of the Fallen Empire (KOTFE) expansion pack. It’s curious I spent a lot of hours playing SWTOR and I finished the trooper storyline, but I didn’t get to play KOTET adn it came out time after I wuit playing SWTOR. Anyway, its designs caught my attention and that’s why I decided to create this costume. Moreover, I’m making Arcann’s costume for my husband, which I’ll finish someday.
I must say SWTOR trailers are amazing, beautifully made and eye ctaching. So much that Senya is my third costume from this game. Years ago I made Satele Shan and Shae Vizla. So hooray for the character designers in this game and for these beautiful presentations. They’re really outstanding!

I made this costume a cuple years ago, I was going trough a rough patch and I didn’t take many progress pictures. I didn’t have much time at that moment, so I just focused on spending the few time I had crafting, so I don’t have as much material as I’d like to show you how I made it. Anyway, I hope you find this tutorial inspiring.
One thing I can show you is all the reference material we got from Source Filmmaker. In adittion to the official art by Eric Montanari.


The base material is craft foam, as always!
No surprise here with the material of choice for this armor. As usual, I used Feroca’s high density craft foam.
I used sewing patters for the breatplate, which is made using 10mm thickness high density foam and I patterned the limb pieces by wrapping myself in masing tape.
I have this personal fixation that consists on avoiding seams on the shoulders, so I always try to open and close them in crazy ways. I don’t know if is visible but the whole neckpiece is joined to the back so the armor opens up on the chest and on the sides. I don’t know if I make my life difficult with these choices, but I think it looks pretty nicely. As I’ve already said before, I’m lucky my head is very tiny so I can make these crazy fixes.


I 3D modeled (with Fusion360) the device on his back and attached it to the armor with lots of glue and screws. I am in favor of screwing whenever possible and this way I make sure that things are not going to fall. I didn’t put this thing up for sale in my shop because it looks pretty good, but as it comes out of the printer it doesn’t fit perfectly with the armor and I had to make some repairs by hand.


In the following gallery I show you a collection of photos that I took while making the shoulder pads and other elements of the limbs.


I had planned this armor to be completely wrapped in body vinyl, and I did so in many places; but some had very complicated reliefs and I couldn’t wrap them well, so I decided to try a product that at that time was relatively new to me: the brand’s vinyl spray Full-dip. Full-dip. What a discovery! I knew Plasti-dip, but Full-dip gives it thirty thousand turns. This paint adheres very well to the EVA foam and, furthermore, if you overdo it and flood the area a little, nothing happens! self-levels with each layer. You have to be clumsy to make this painting look bad. What’s more, I don’t know if it’s very orthodox, but I like that it soaks in well because then when it dries, it leaves a very uniform and beautiful layer, without bubbles or drips. It’s magic. As an extra fact, Full-dip is a product developed in Spain, so we are supporting the national product.
Vinyl wrapping
I used Audioledcar body vinyl to wrap some parts of the shell and arm armor. The most notable is the chest area, which in the original model has a shiny black appearance. I also covered the gold details with vinyl.


Paint
And here comes the annoying Laura to tell you that the best way to learn how to paint armor is to watch miniature painting tutorials. As always, I recommend Ángel Giraldez’s YouTube channel, with which I have learned a lot.
To give it that worn touch, I painted a gray shading on the joints and edges of the white armor and finished by outlining the projections in white again. This gave a lot of dimension to the armor. I didn’t touch the shiny black part at all and I aged the gray and black areas of the rest of the armor by applying a dry brush in silver tones on the edges.
These designs are deceptive because they look like pristine armor, but you always have to add shading to highlight the volume and details.


Detailing
Some of the details of this armor are designed in 3D and printed in resin, such as the futuristic buckles on the back. And many of the EVA reliefs are engraved with a heat knife.


Lightning
This armor has LEDs on the front of the armor, on the devices on the back. I don’t have photos of how I made the circuit and I would be embarrassed to show it to you. I can only tell you that I used COB LEDs in ice blue color and a very cheap circuit with 12V batteries that didn’t last long (because I don’t handle Ohm’s law and putting resistors well, sorry, I’m a woman of letters). But look how beautiful it is when it works.


Textile
Under the armor, Senya Tirall wears a beautiful outfit that is not without difficulty. She is wearing pants in three colors with drawstrings.


And on the upper part of her body what stands out the most are the sleeves, which have some pretty interesting overlaps. I don’t even understand the pattern I made today.


Lase spear
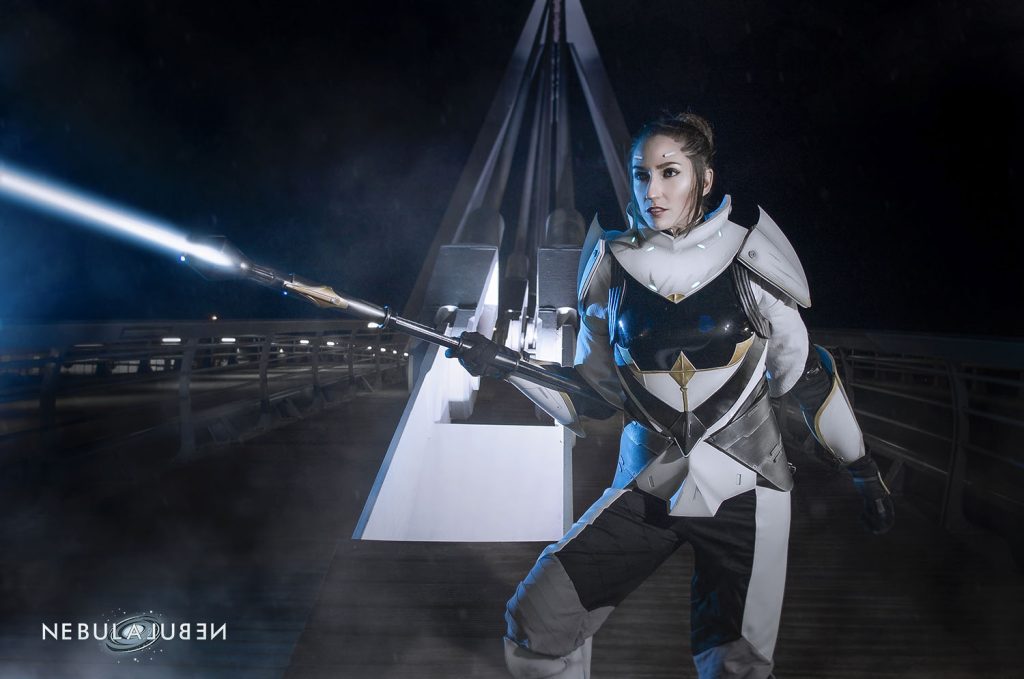
I designed Senya’s laser pike with Fusion360, printed it, embedded it in a PVC pipe and painted it. I have not worn this cosplay to any events. Surely, when I finish Arcann for my husband (in 2047, for example), I will add the lightsaber edge. For the photos I put it with Photoshop because I think it looks a thousand times better. Even if she had done it physically, she would have put effects on it in post-production.


And that’s all! This is how the costume looks:


