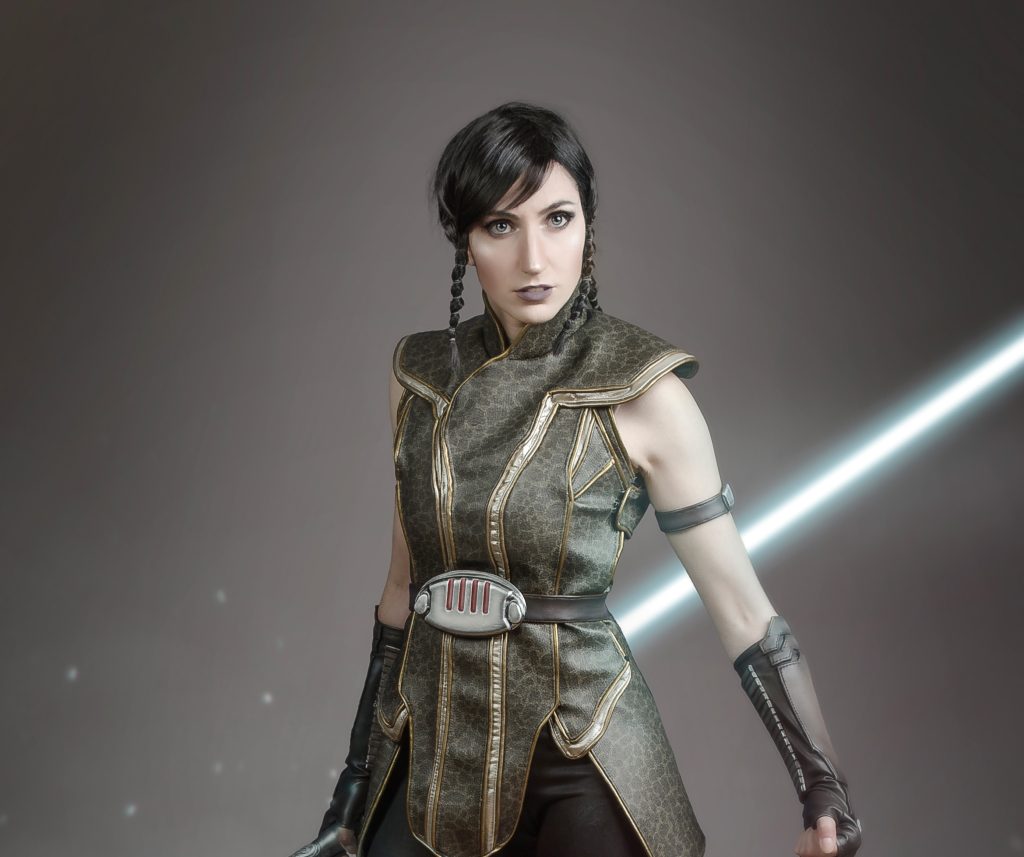
I continue rescuing cosplays that I had not yet explained. Satele Shan is a special case because it is a cosplay that I made for the first time in 2011, with the hype of the trailer titled “Hope” from SWTOR, and that I remade a couple of years ago for something that… hasn’t come out yet and is surprise! The thing is that this is one of the creations that has helped me verify my evolution as a seamstress over time.


Maybe you don’t notice that much of a difference, but for me it’s a huge change. From the treatment of the fabrics, through the seam, the hairstyle, the makeup, to the EVA foam elements of the armor and the 3D design of the saber and buckles. As a curious fact, right after making this suit, I started attending sewing classes at Siete Hilos school (in Madrid), where I am acquiring pro-level knowledge. And I wish I had started earlier because today I could cosplay in an almost professional way.
As always, I used various concept arts to have a clear reference of the model.

And I also based myself quite a lot of the cosplay made by Catherine Jones for Ahsoka Tatoo, who I had the pleasure of meeting at the 2017 Star Wars Celebration in Orlando!


Sewing
For my 2011 cosplay, I used a black and green patent martele/hammered looking fabric from Ribes y Casals (a fabric shop in Madrid) that looked pretty accurate. What’s more, if it had existed in 2022 I would have bought it, but no matter how much I searched it seems that it was discontinued. Currently I can only find it in purple. So I decided to make a design in Photoshop of the texture and sent it to be printed in imitation leather at Textilfy. I have to say that I am very satisfied with the product. I guess it’s the Spanish version of Spoonflower.

With the fabrics at home, I made the patterns for the tunic, which are made with the technique of wrapping myself in tape and drawing the pieces on top. This outfit is somewhat difficult to visualize due to the connection of the shoulder pads to the body.


After patterning, it was time to move on to the fabric, cut and sew. To make this suit, I had to make the most of my spatial visualization capabilities. And, of course, breaking my fingers making the golden imitation leather piping. Because if I don’t do 150m. piping in a cosplay is not me!
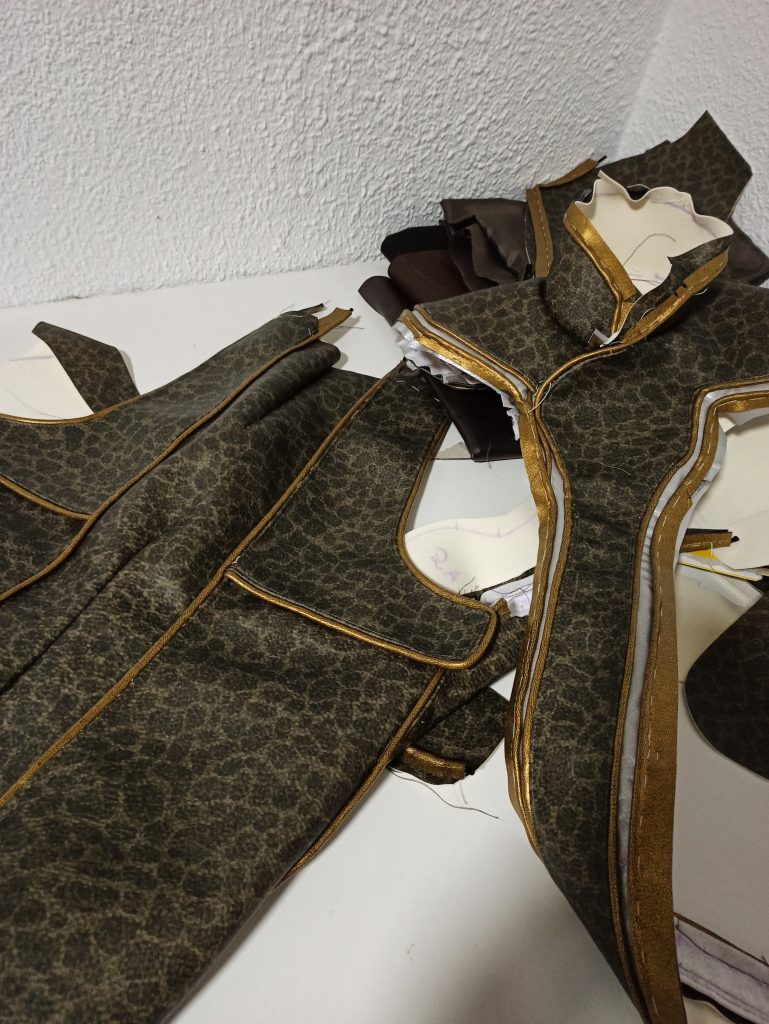


For the attachments, I made the decision to leave just enough space at the neck to put the head in and I opened the garment on the side. I didn’t want to make the attachment in the center so that the front part, which is where the eye usually goes, wouldn’t be too bulky. I have many of these quirks when it comes to putting closures. I used snap button strips, which are quite sturdy.


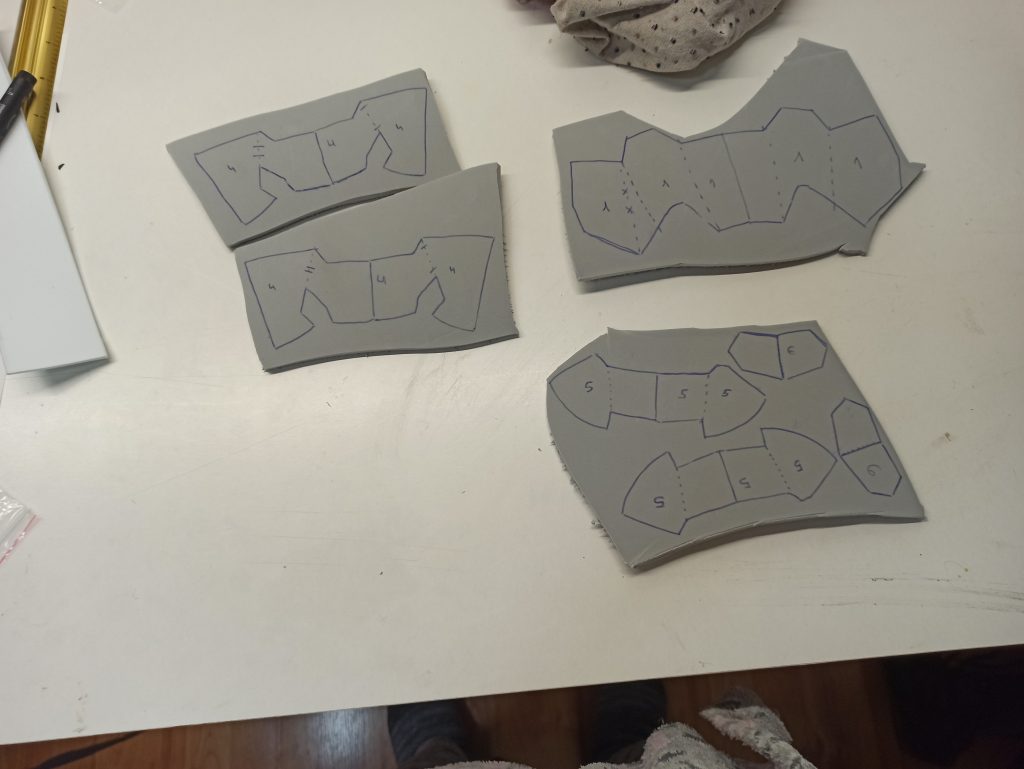
EVA foam armor
Brought to you by
The leg armors are made with 5mm craft foam from Feroca. I patterned each part in one piece and cut at an angle on the back without going through the whole thing to eliminate material and make them bend at an angle. In this way, I got very clean and smooth edges. I explain this technique better in my book. I primed them with white glue and painted using acrylics and an airbrush. I took special care with the shading.
The armor is attached to the boot covers with velcro and straps.
The rigid, padded-looking parts of the gloves are made with 2mm EVA foam lined with polypropylene and there is also a powerful shading job there.


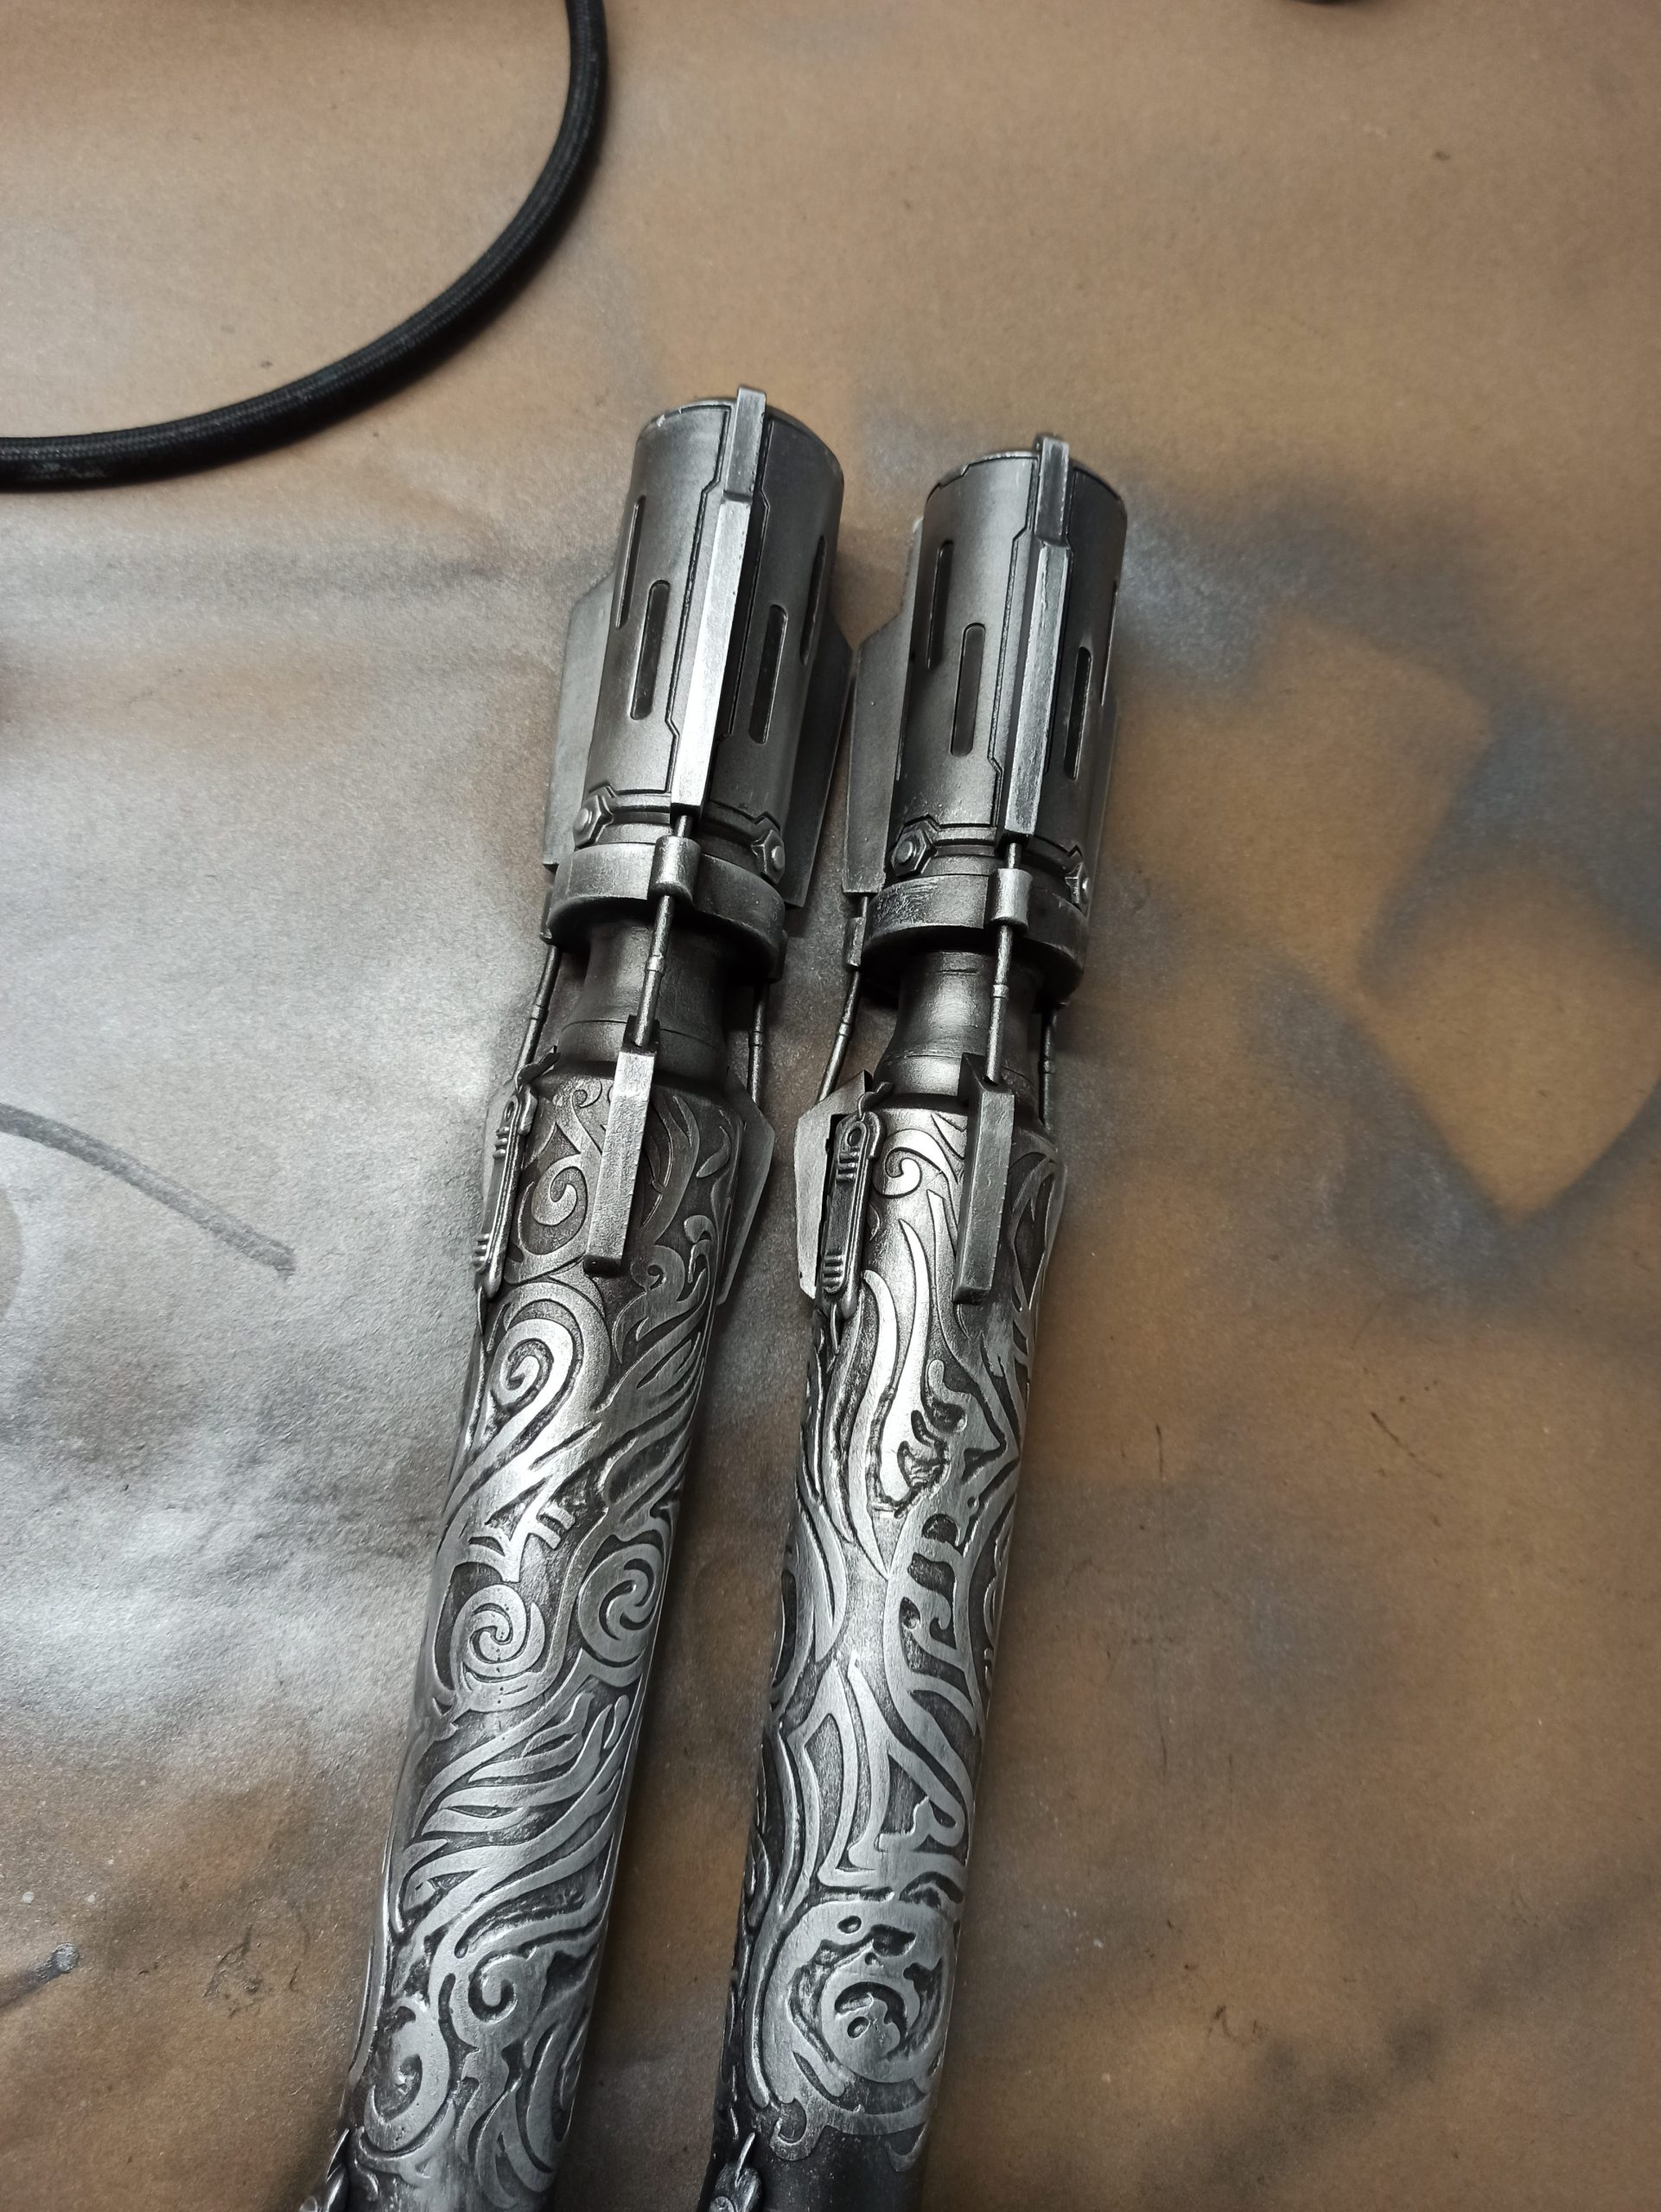
Sable láser y otros elementos impresos en 3D
Both the saber and the buckles are 3D designed with Fusion360 and printed in resin. At that time I had a very small resin printer, the Anycubic Photon Mono, so I had to cut the sabers in several parts. I currently have an Anycubic Photon Mono X2, which has a much larger print area.
As usual, I didn’t worry about preparing transparent plastic edges or LEDs for the sabers because I think they look better with postproduction.


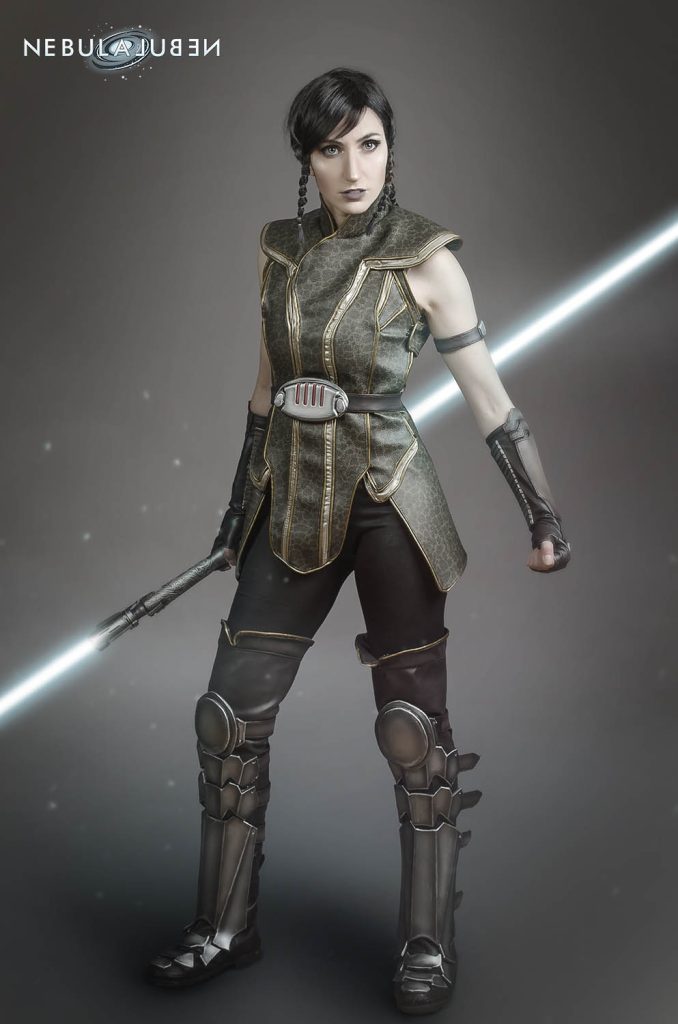
And this is the finished costume!

As I said at the beginning, I remade this cosplay for a small collaboration that hasn’t come out yet, hehe. As soon as it’s ready, I’ll let you know because it’s a very, very cool thing. Thank you for reading!


