It’s been a long time since I’ve made a costume in a rush but it was about time, right? Mainly because, c’mon, IT’S MASS EFFECT. What did you expect? My hype is so high right now that I’m taking the chance I’m inspired to make this happen ASAP.
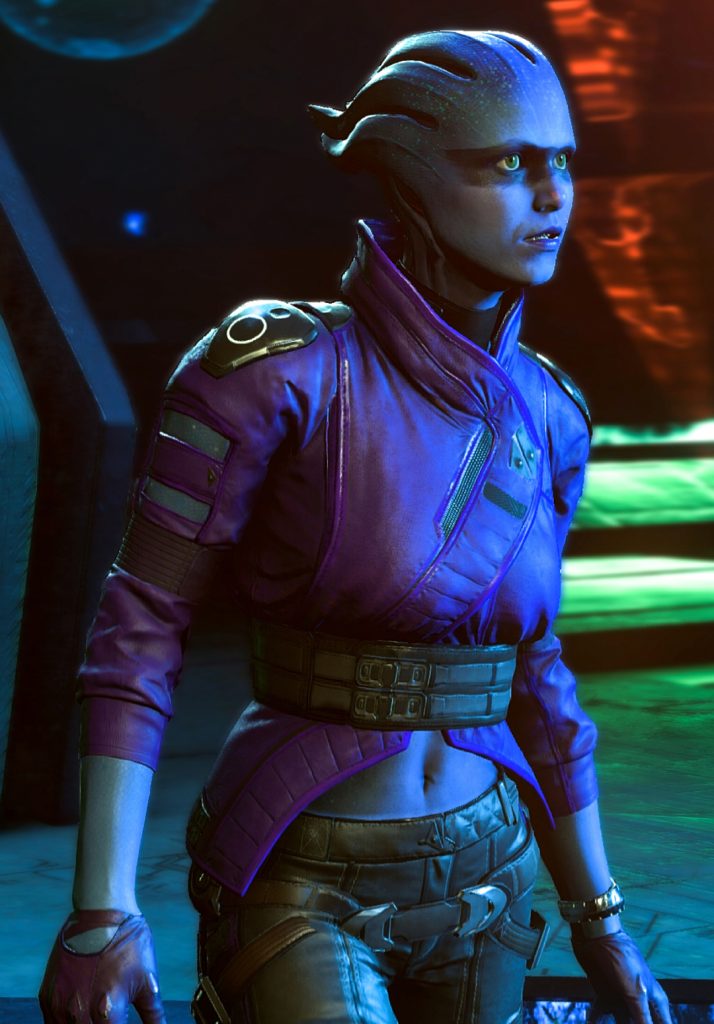
I’ve always wanted to make an asari costume (and no, the first one I made doesn’t count because I was wearing a hood) and now that I have the Formx sponsorship I feel pretty confident to level up a little bit and make some tentacles. I love Peebee’s outfit. It’s amazing and I’m totally in love with the character since the first time I saw her (maybe she’s unbearable ingame) and, because of that I’m putting all my effort to finish this costume before the game release. Will I make it? We’ll see, we’ll see. Only time and my lack of sleep will know.


Well, this jacket I’m showing you today is the second one I made. I first made one with a non so accurate color because I chose it without having enough references (the hype train) and, after watching the second trailer, I decided to start over.
Also, this garment has a very special color as it’s a kind of purple that gets drastically affected depending on the light source. It looks very rosy when there’s a warm light source and very bluish in cold illuminated environments.
Luckily for me, or rather, thanks to my infinite patience and obsesive thinking, I ended up finding the perfect pleather fabric in a french fabric store. In fact, you’ll see some pictures in this tutorial in which it appears more rosy or more purple. Magic!!
I used that purple pleather and I sewn some details using a black perforated one and a carbon fiber look silver pleather from Sae’s store.

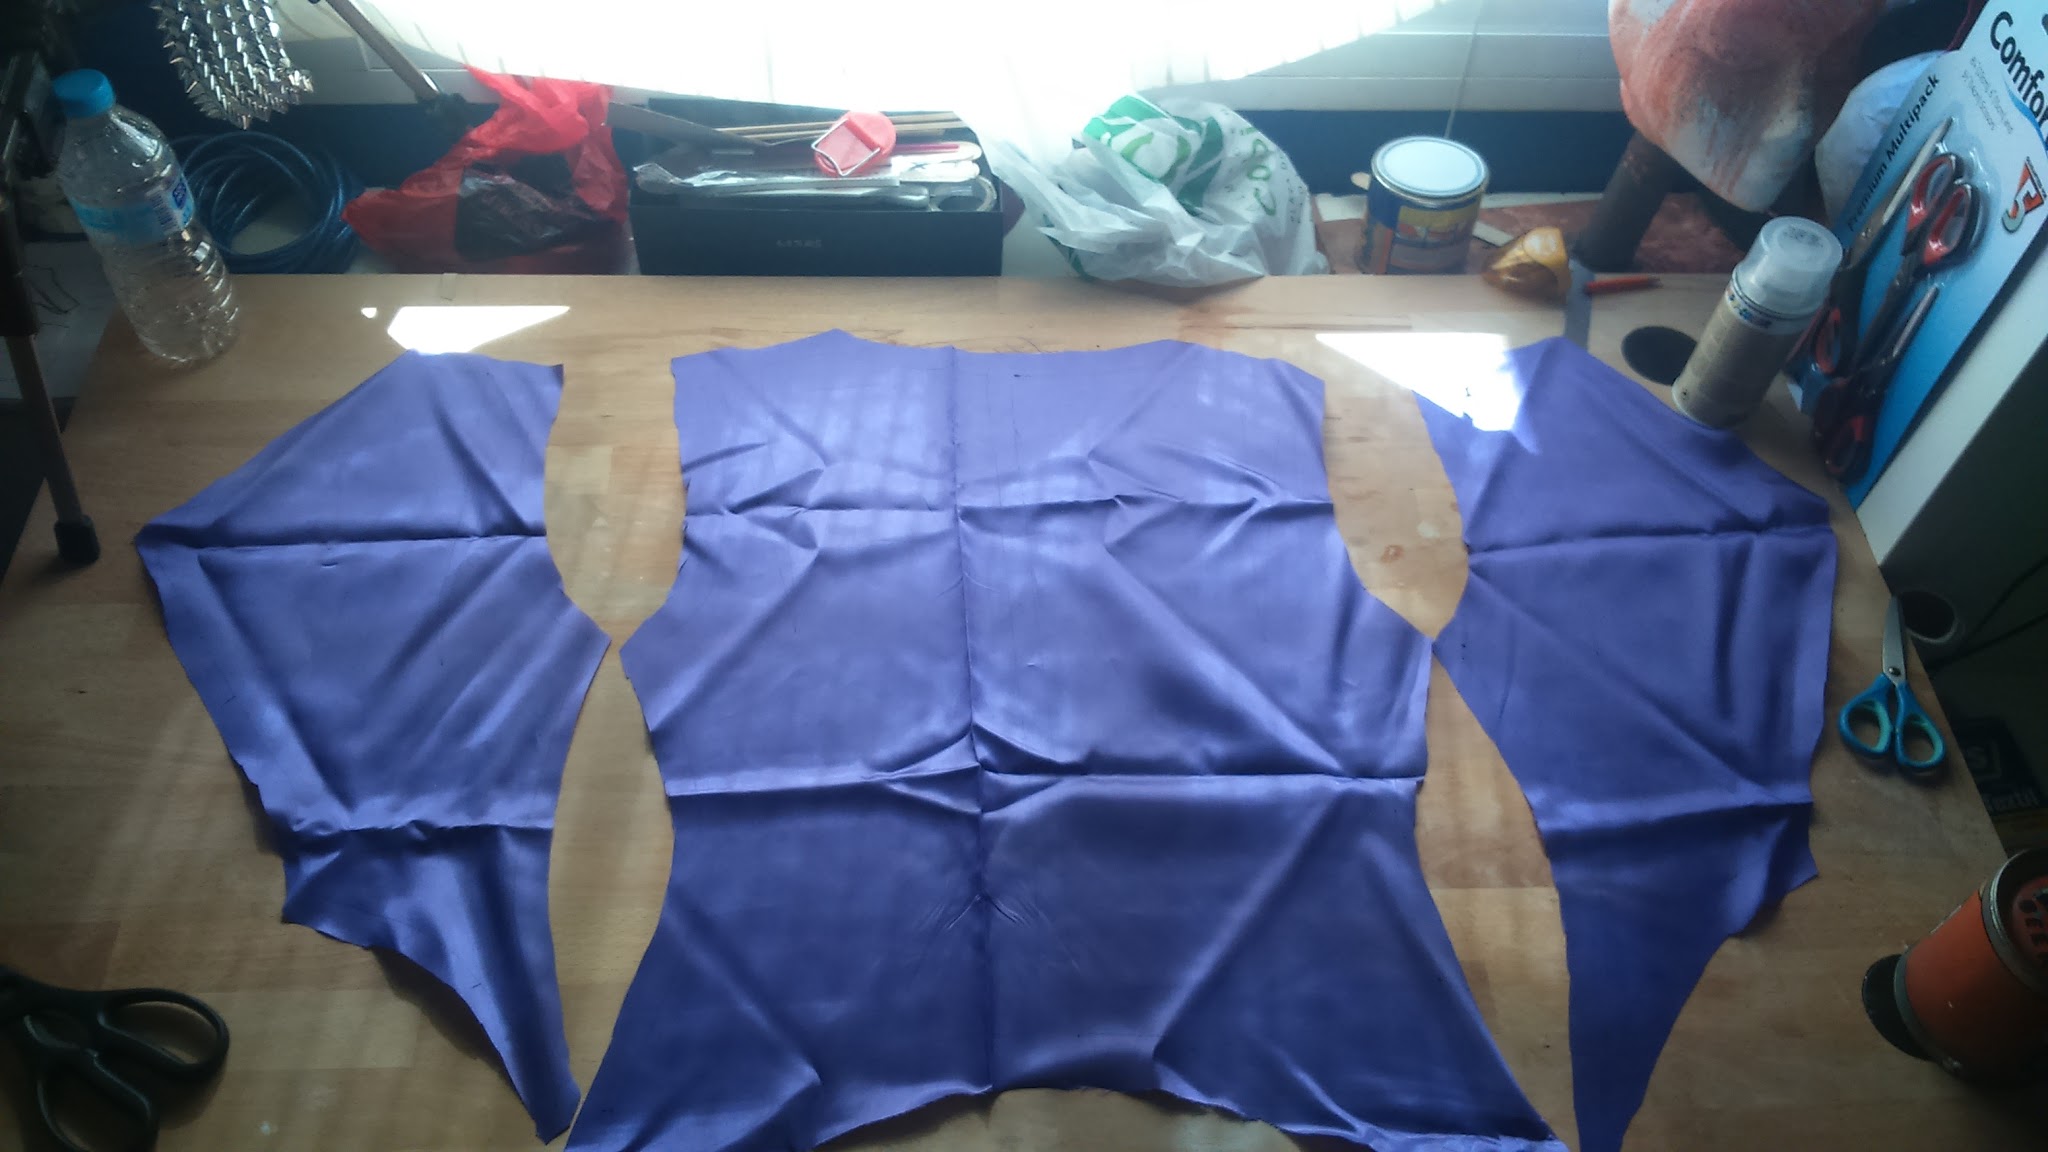
First I made a drawing of the patterns in a A4 sheet to have an idea of how everything should go. Then I drew them on a piece of cardboad.

 |
| Half front, half back and the sleeve pattern. |
The sleeve was a little longer tan expected, so I eventually cut it. I don’t have pictures of it but it’s no big deal. I just raised the cuff a little bit.
As you can see, I altered the basic sleeve pattern by taking a piece from one side to the other to avoid the seam passing trough the elbow piece. Little tricks. Also, as the shoulder is a little narrow in this jacket, I added an extra piece to the sleeve pattern to compensate that.
I also joined together the collar pieces to get an accurate pattern.


At that moment I was ready to make the lining, that is a simpler version of the jacket with no details. I just kept the darts because they’re essential. The front, the back and the sleeves are made with lining fabric and the collar and the cuffs are made of pleather to make it look better.


I joined the collar and the piece that goes together with it and goes down to the hip to a foam one to make it look thicker.


Once I drew the pieces, I joined everything together.
The upper and lower part of the back have a little seam in the center because usually there’s a centimeter extra to make the lining a little looser and more confortable. So there are those two little darts for it to match with the original jacket shape. To illustrate it better, I’ll leave here the picture of the book “Compendium Of Sewing Techniques” from where I learnt this.


And that’s the lining. This is the nice part.


And this is how it actually faces the body: with the ugly seams outside. This way the lining looks nice keeping the ugly seams inside the garment.

Once I finished the lining, I started making the detailed visible pleather jacket.


I did something similar than with the sleeves with the selvedges: As it looked good, I joned together the front and the back ones.


Then I made the piping by using piping I bought in the store covered with the purple pleather. I put it between the collar and the selvedges seams. I love piping!! I think it gives a profesional finish. I use it everytime I have the chance and, of course, everytime it appears in the original design.


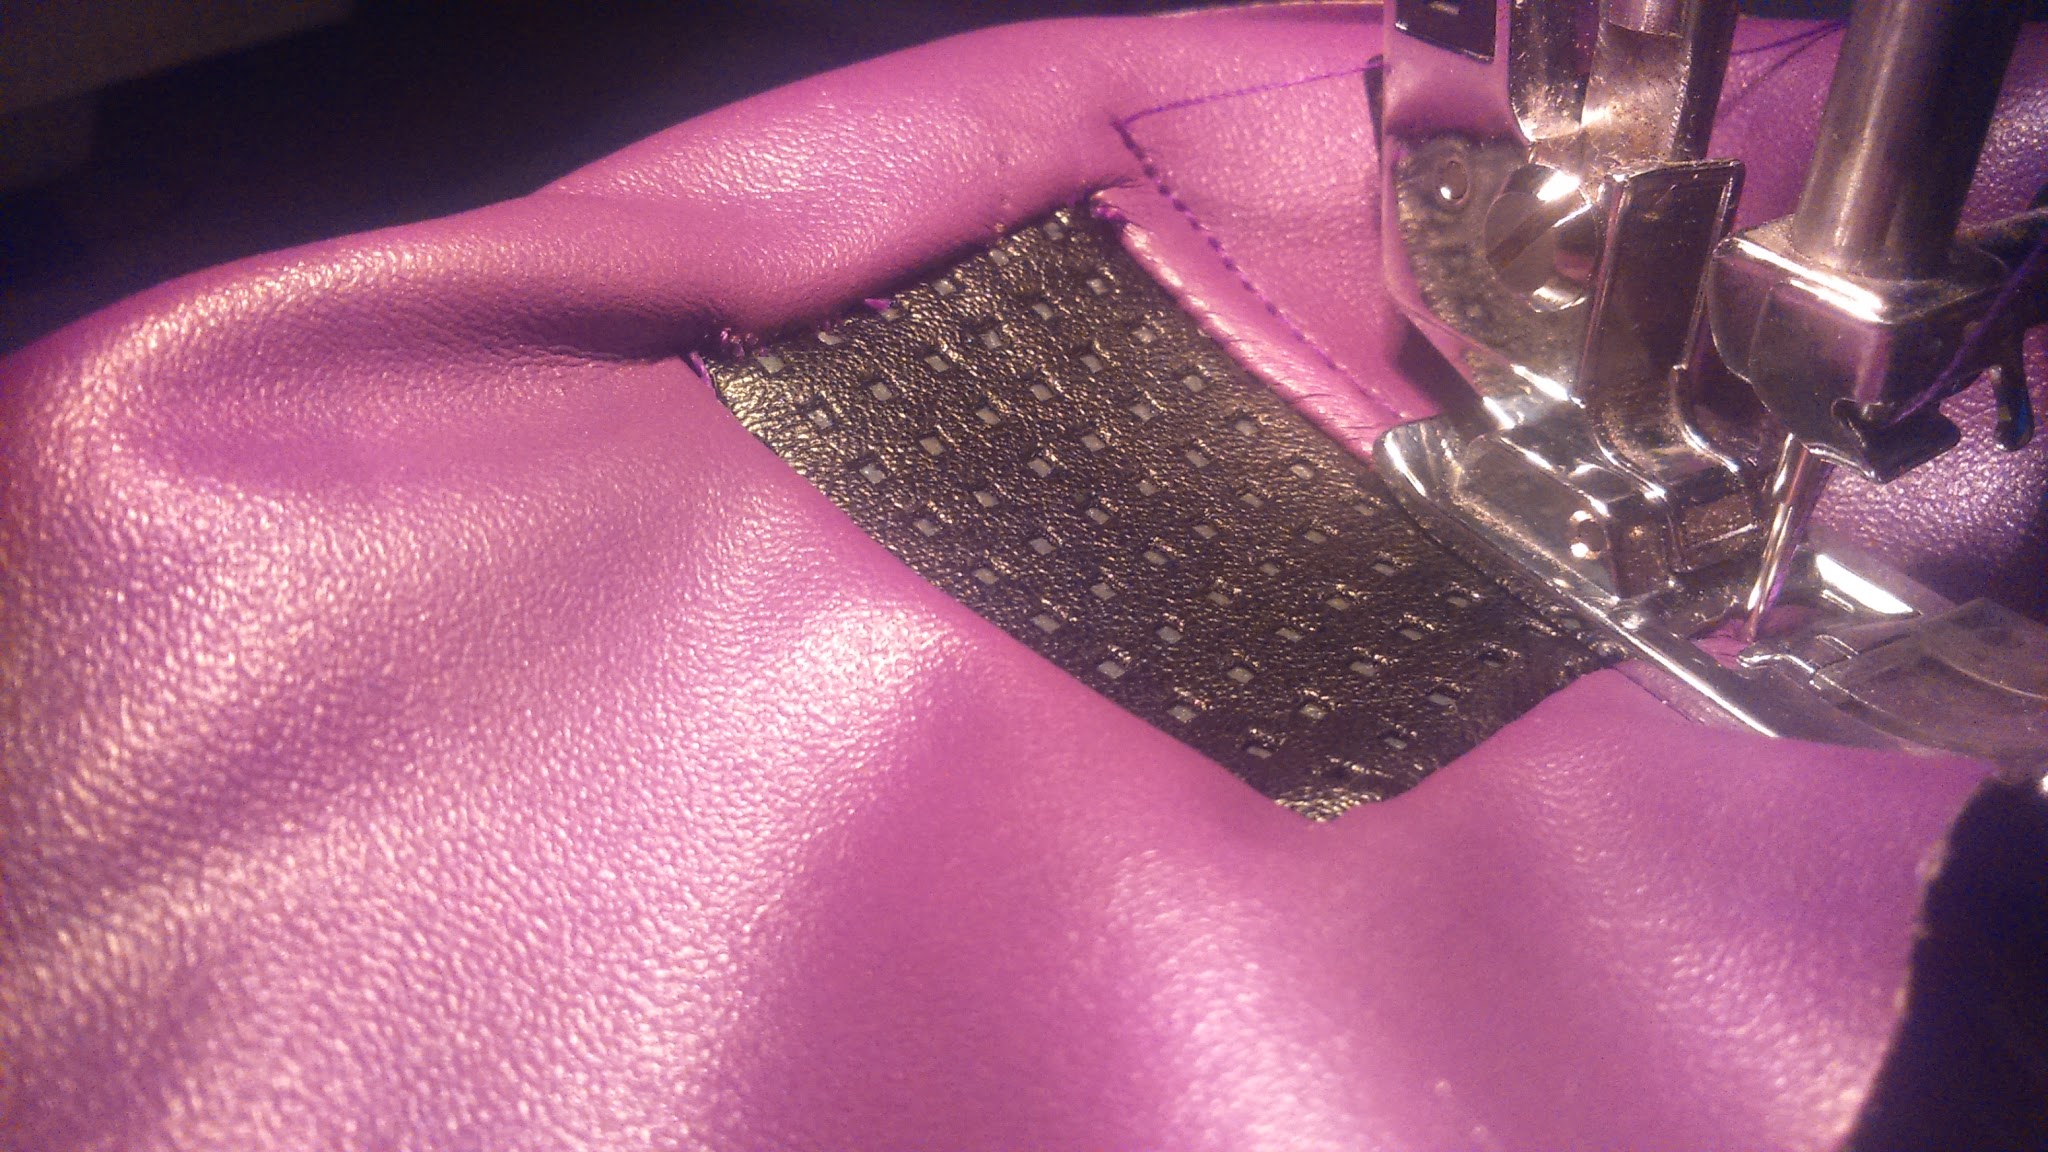
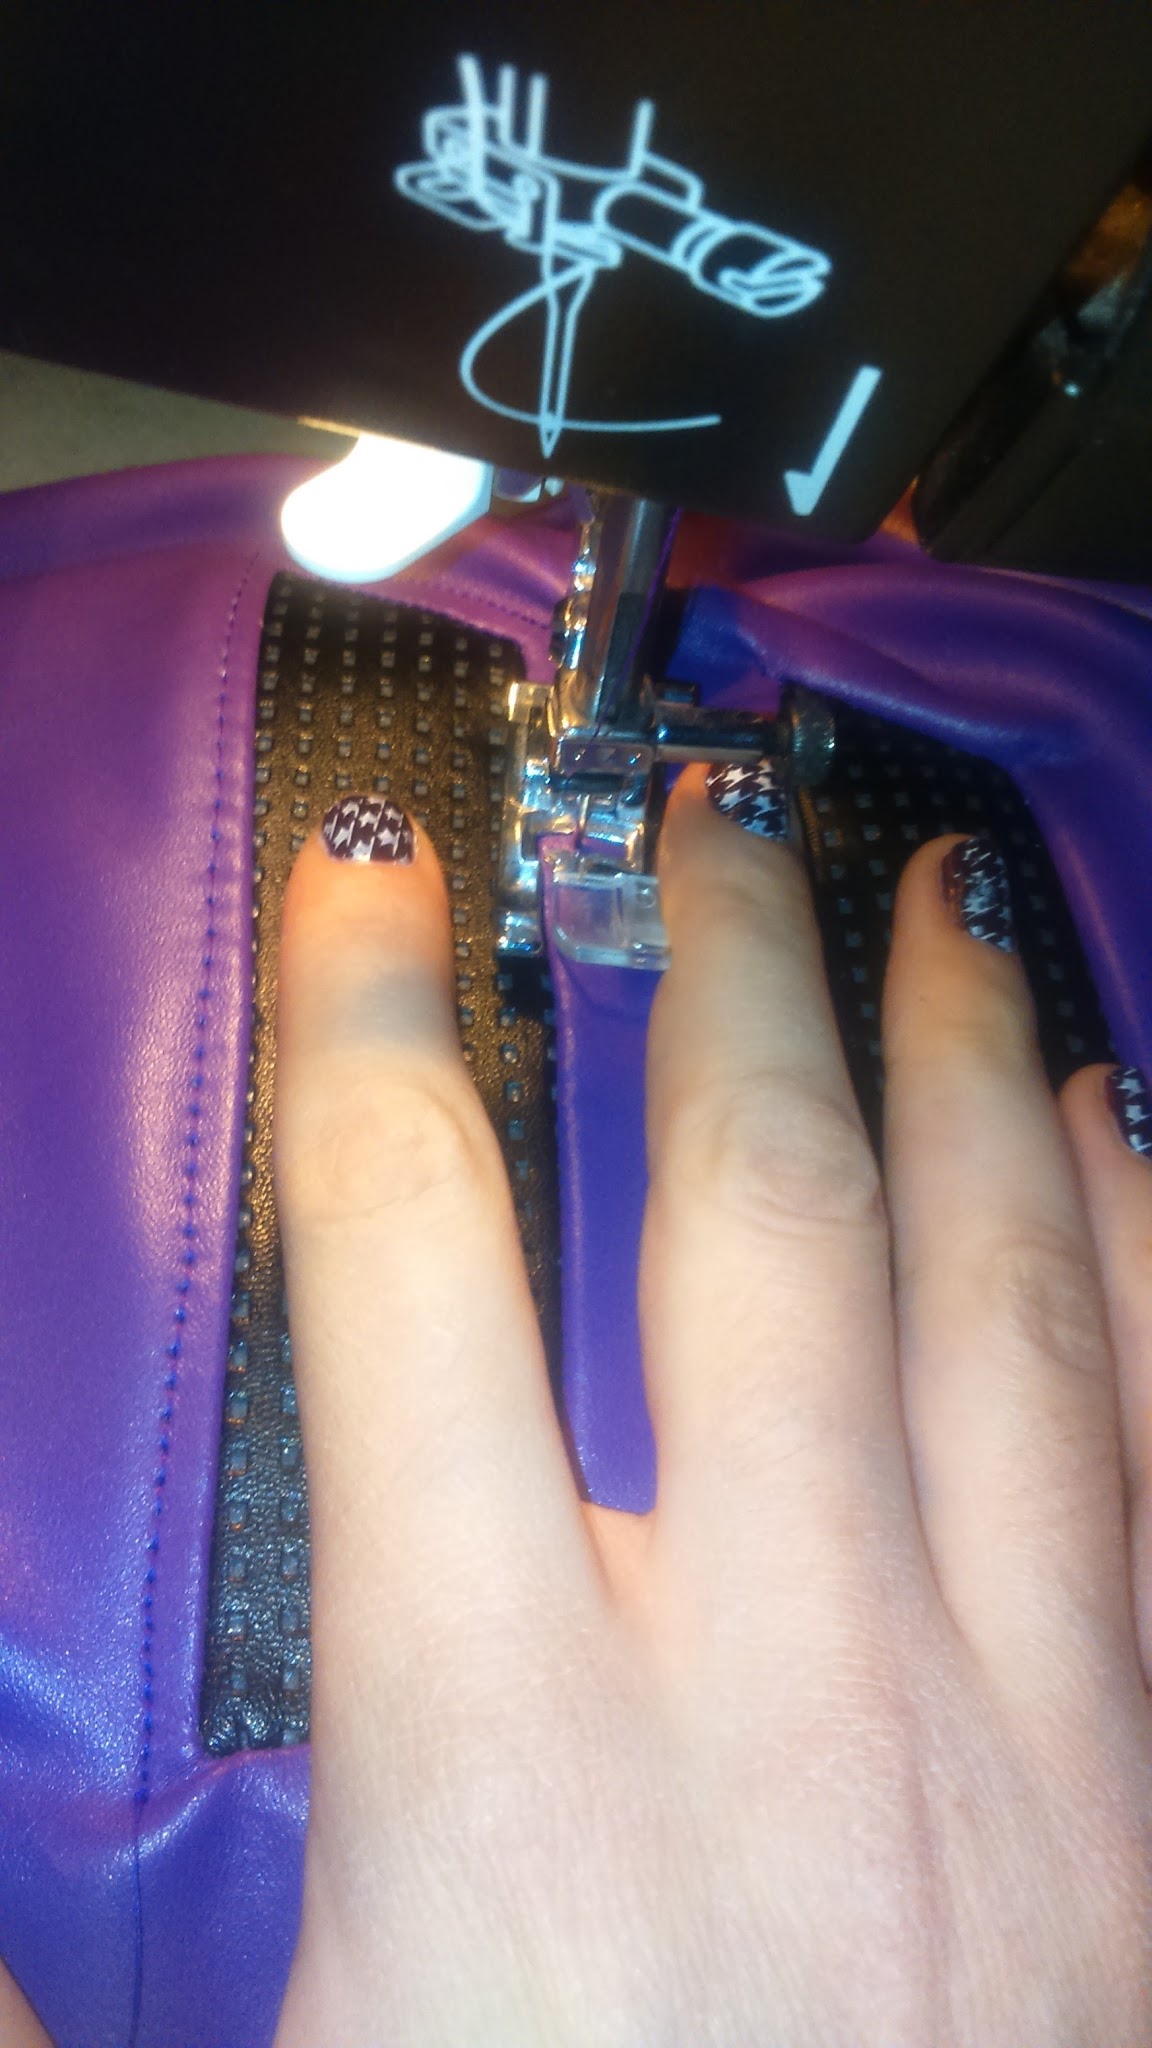
After that, I added the textured details: all the little black perforated squares and the carbon fiber ornaments.
I actually don’t know how to explain the full process of sewing these inside the jacket but I took a bunch of pictures and maybe that’s claryfing. I don’t know.
 |
| I glued the perforated pleather to a grey fabric for it to be easier to sew. |


After adding each piece, I sewed around it making a decorative and also reinforcing seam that provides a nicer finish.


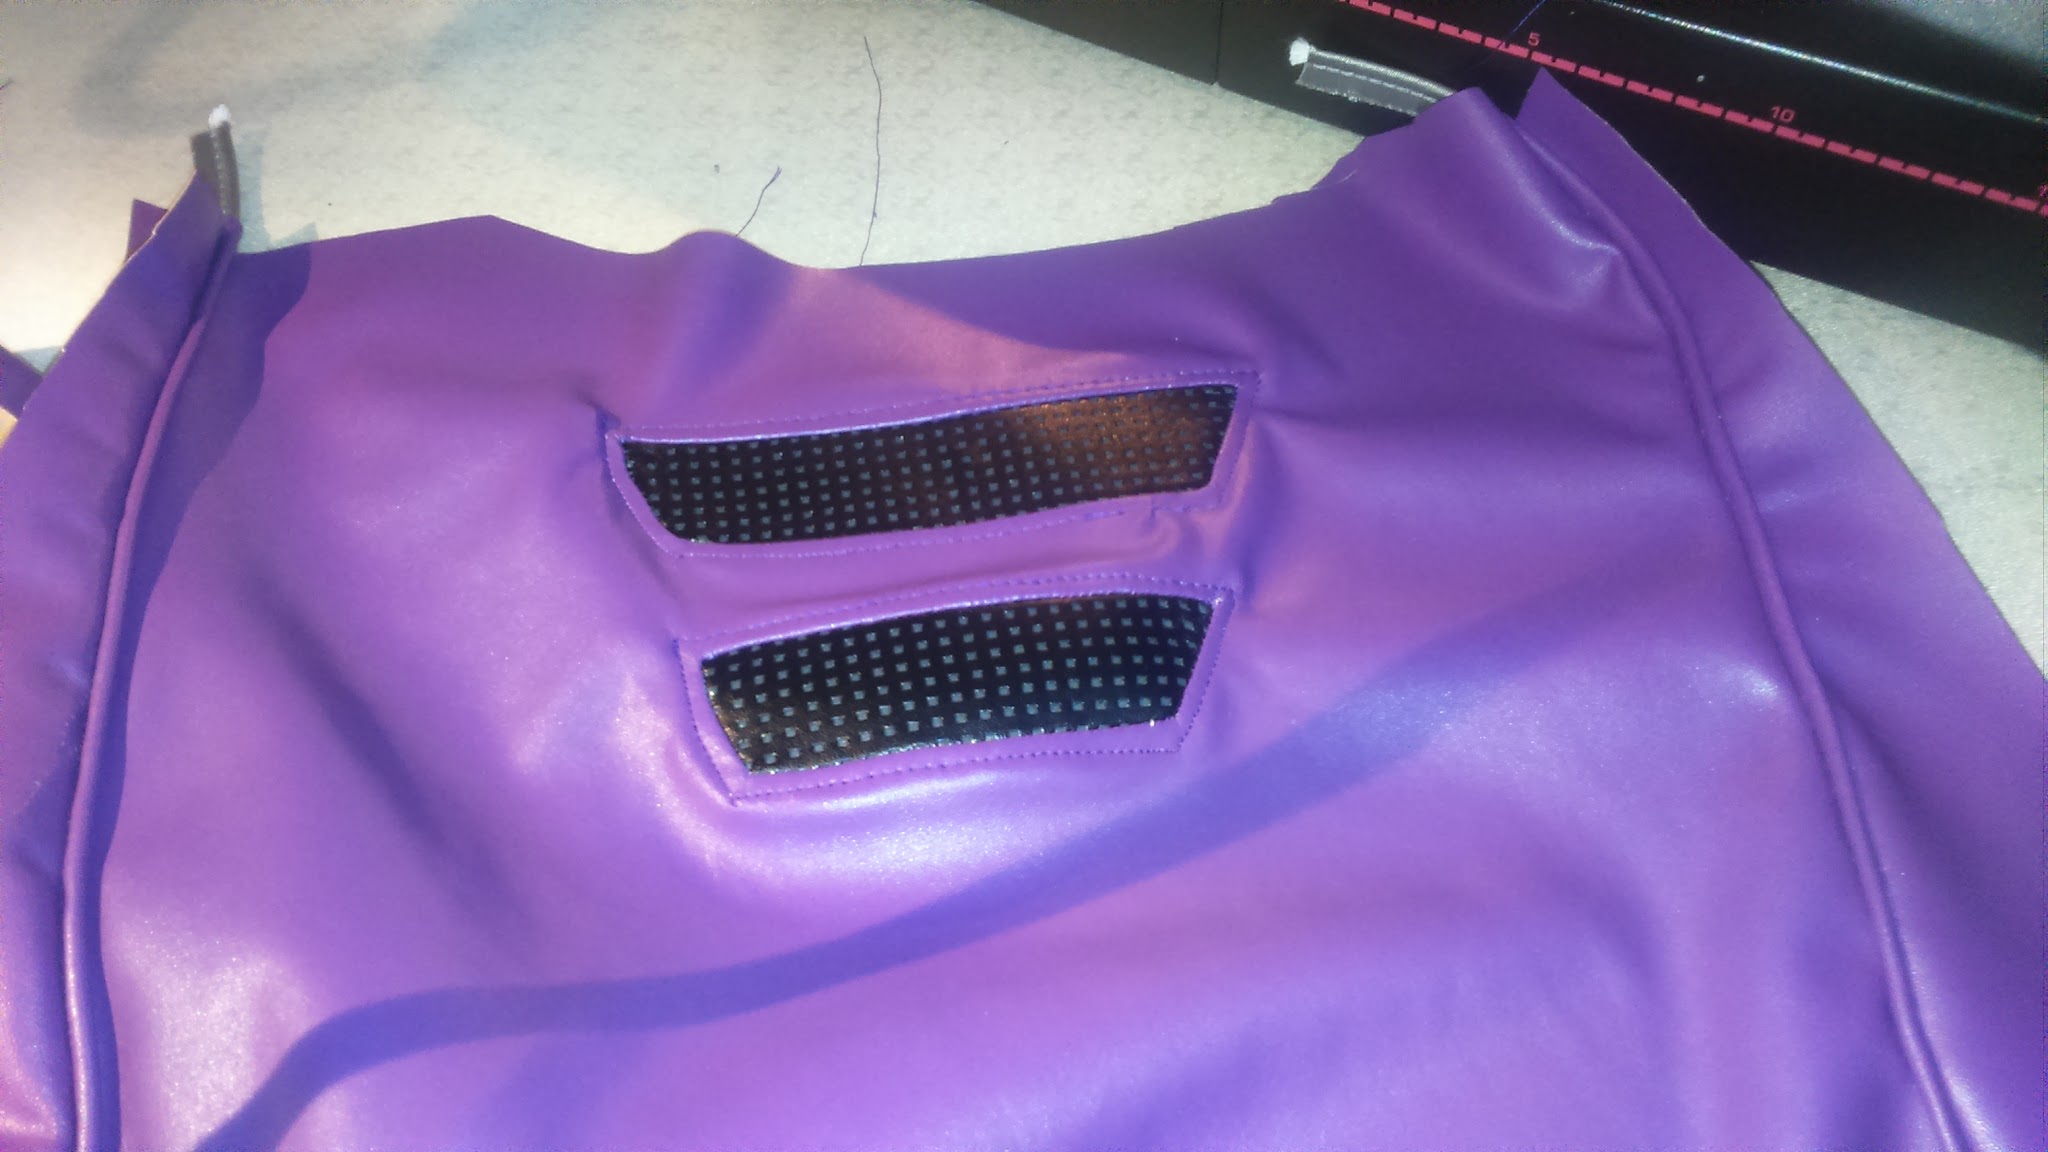


Before closing the garment, I sewed eyelets in the parts where Peebee wears LED lights, just to be able to pass the wires trough them.


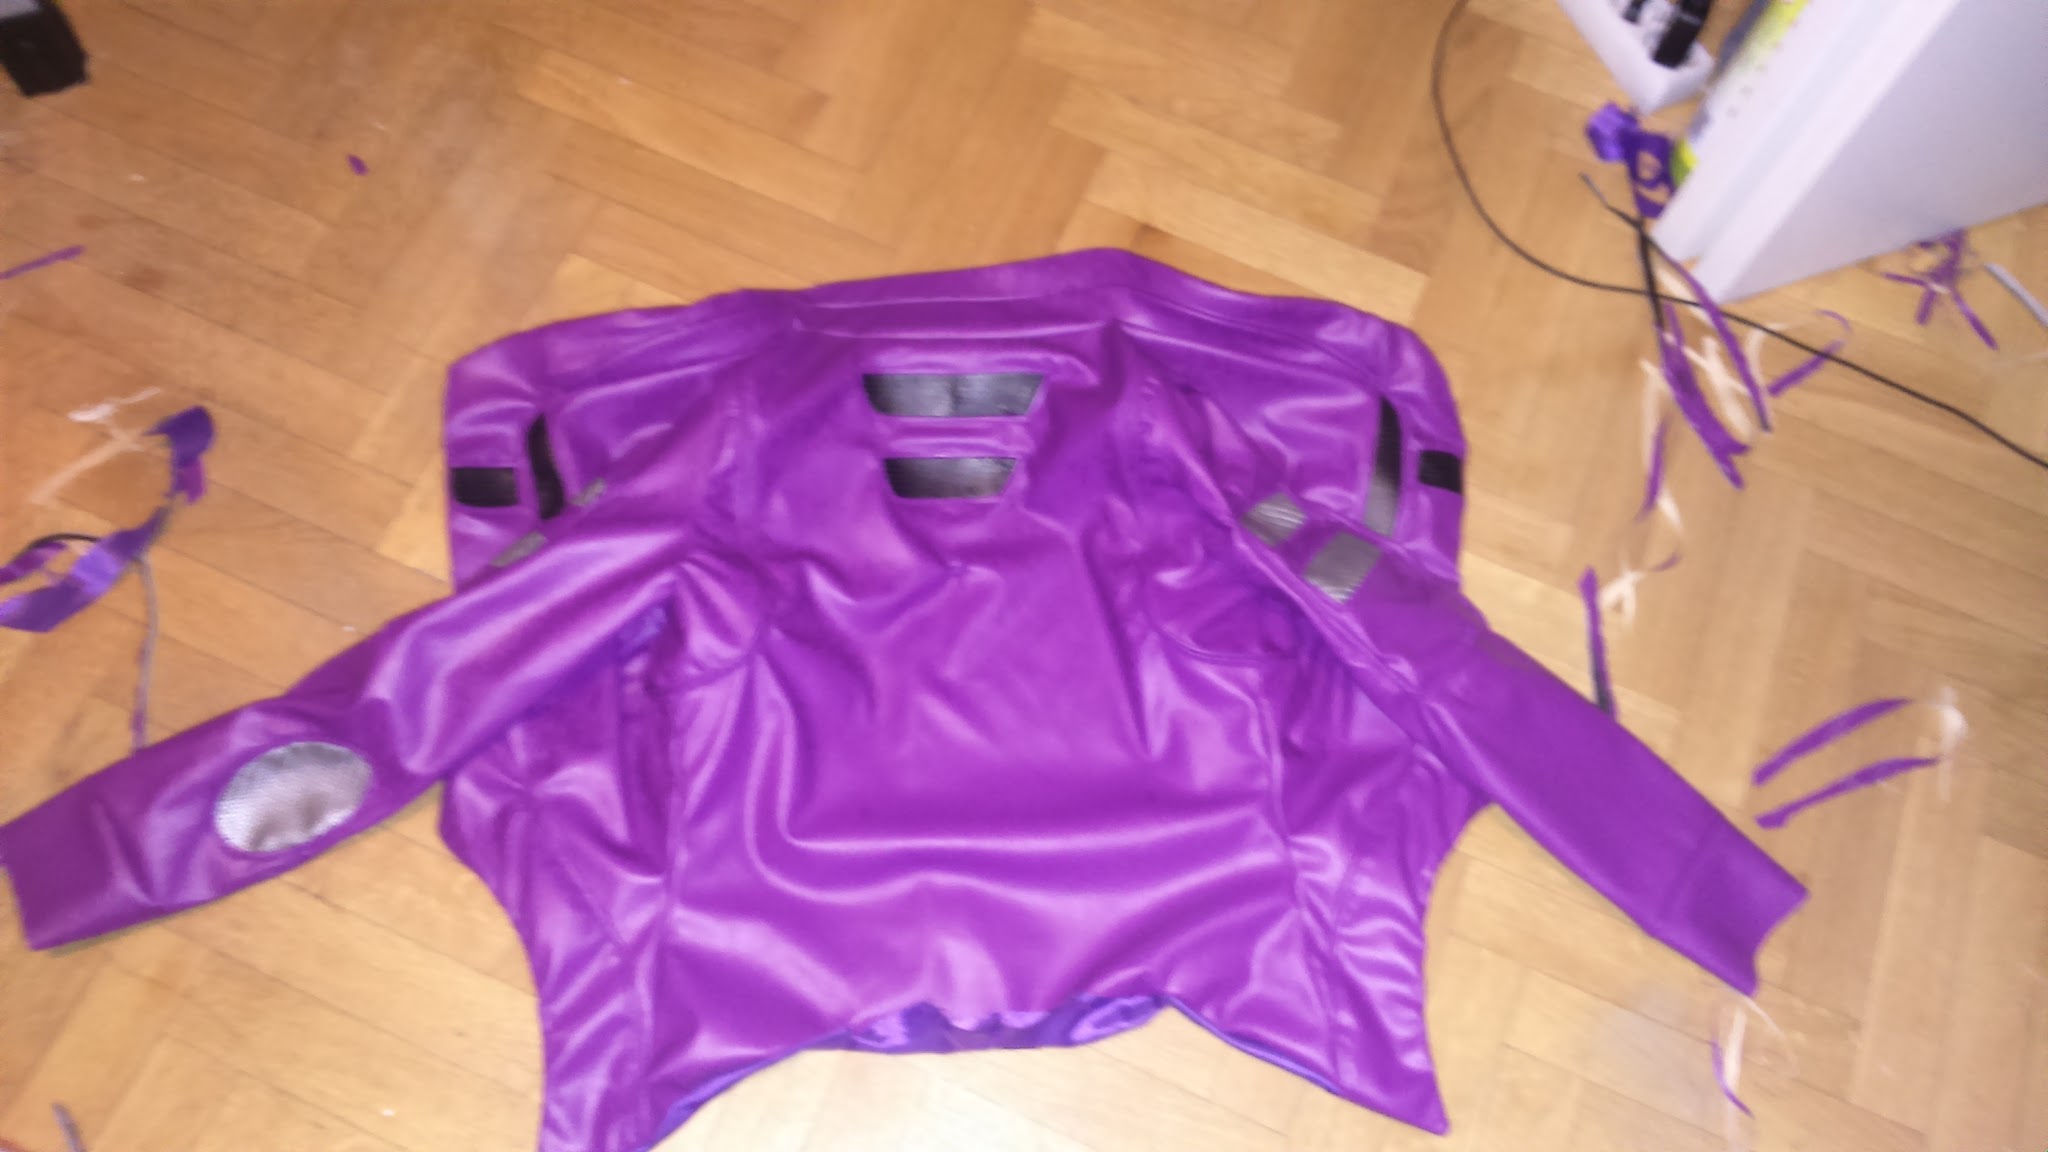
And, with all the details installed, I put all teh pieces together.


I don’t have any pictures of the finished sleeves. Anyway, once I had both the lining and the visible part it was time to join them together. To do that, I confronted the visible part and the nice part of the lining and I sewed their edges together. I didn’t sew the sleeves yet.


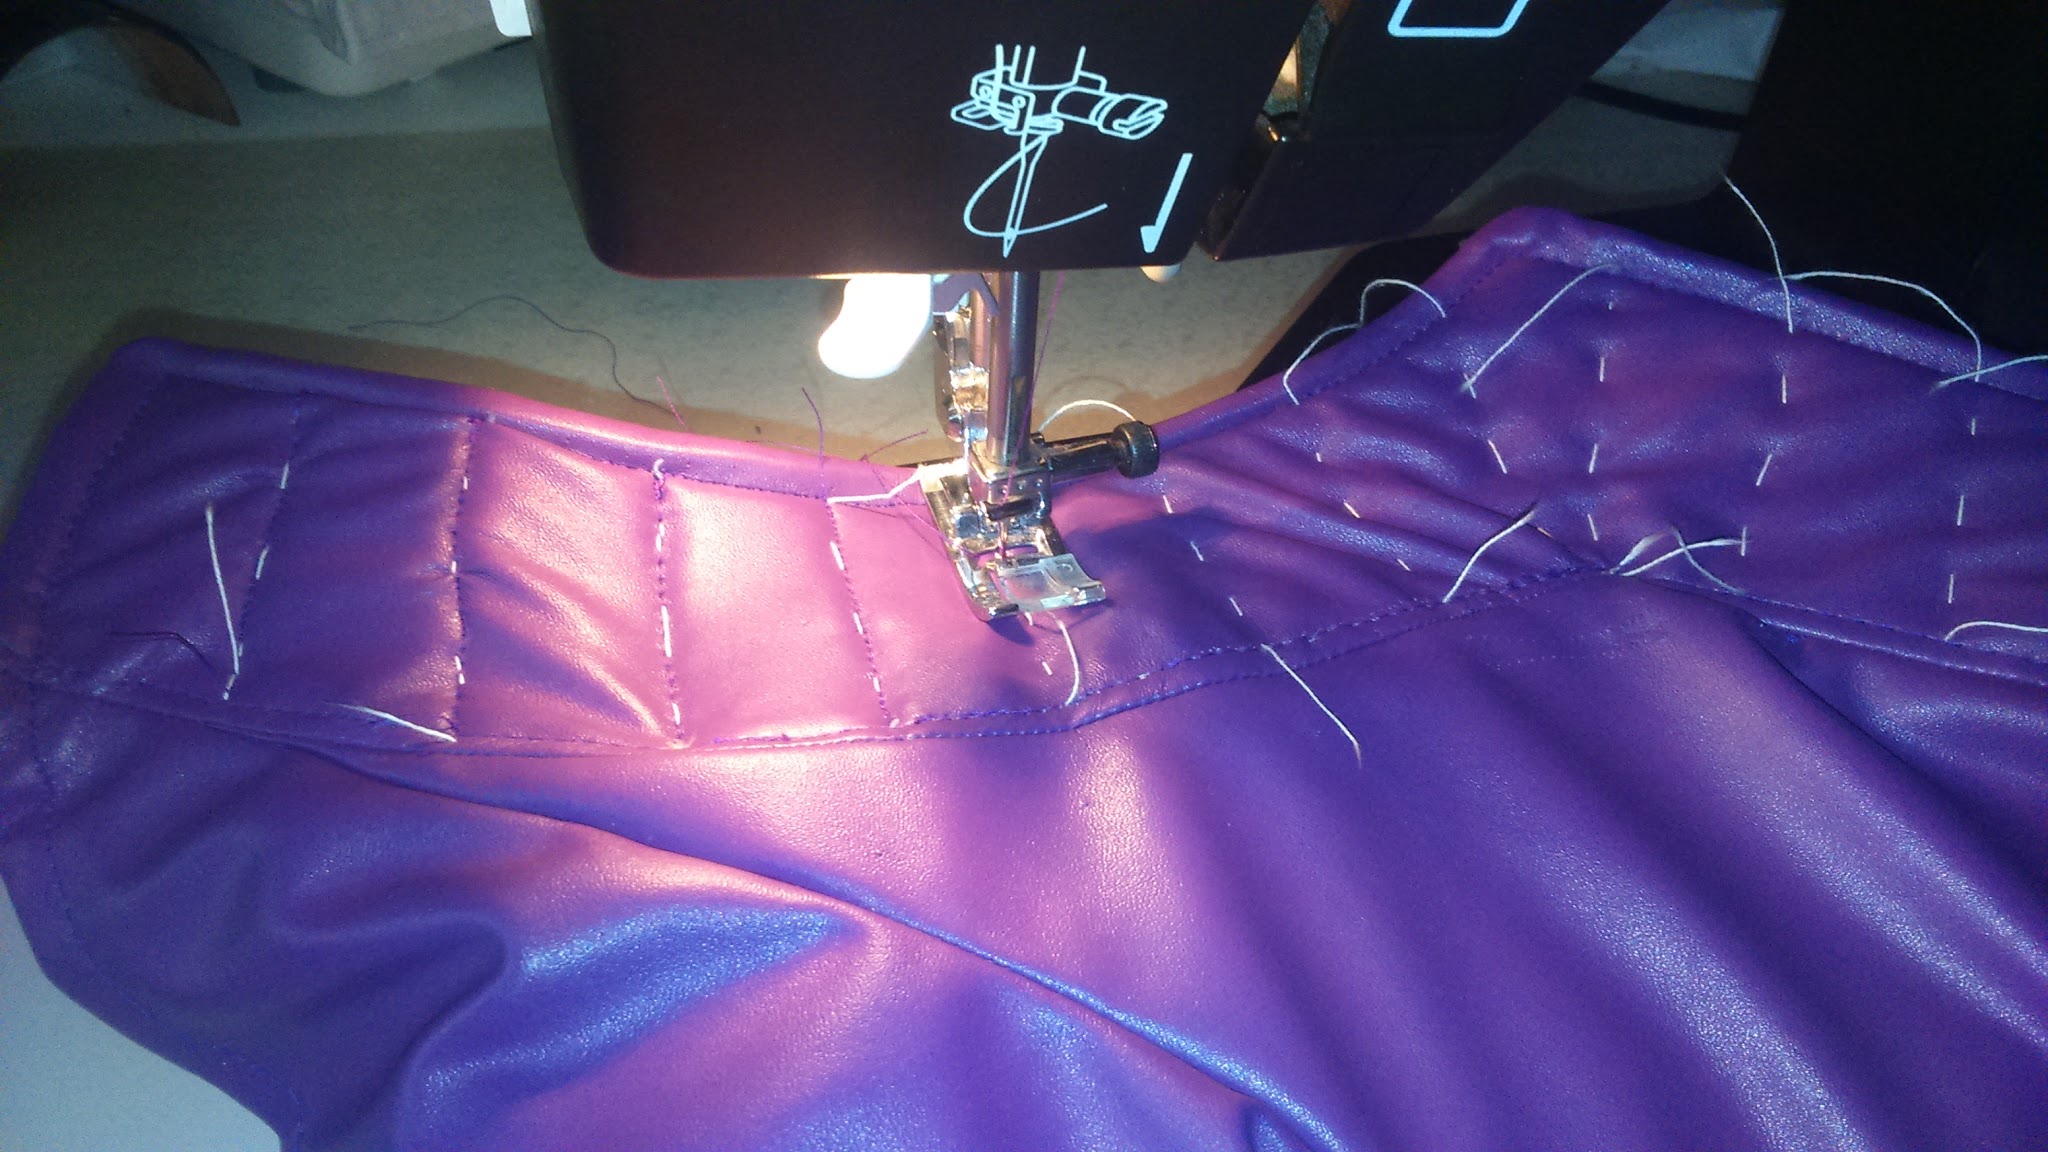
I let a hole in the lower part of the back for me to be able to turn it outside.

And, before flipping it over, I cut the remaining seam to avoid unwanted lumps.


After flipping it over, I closed the lower part of the back and I reinforced all the edge.


And then I closed the sleeves.


I joined them together using a zig-zag seam to keep the elasticity of the original fabric.


I added all those ornamental seams this jacket has on its inner edges.
And, to finish it, I sewed a couple push buttons to be able to close it.
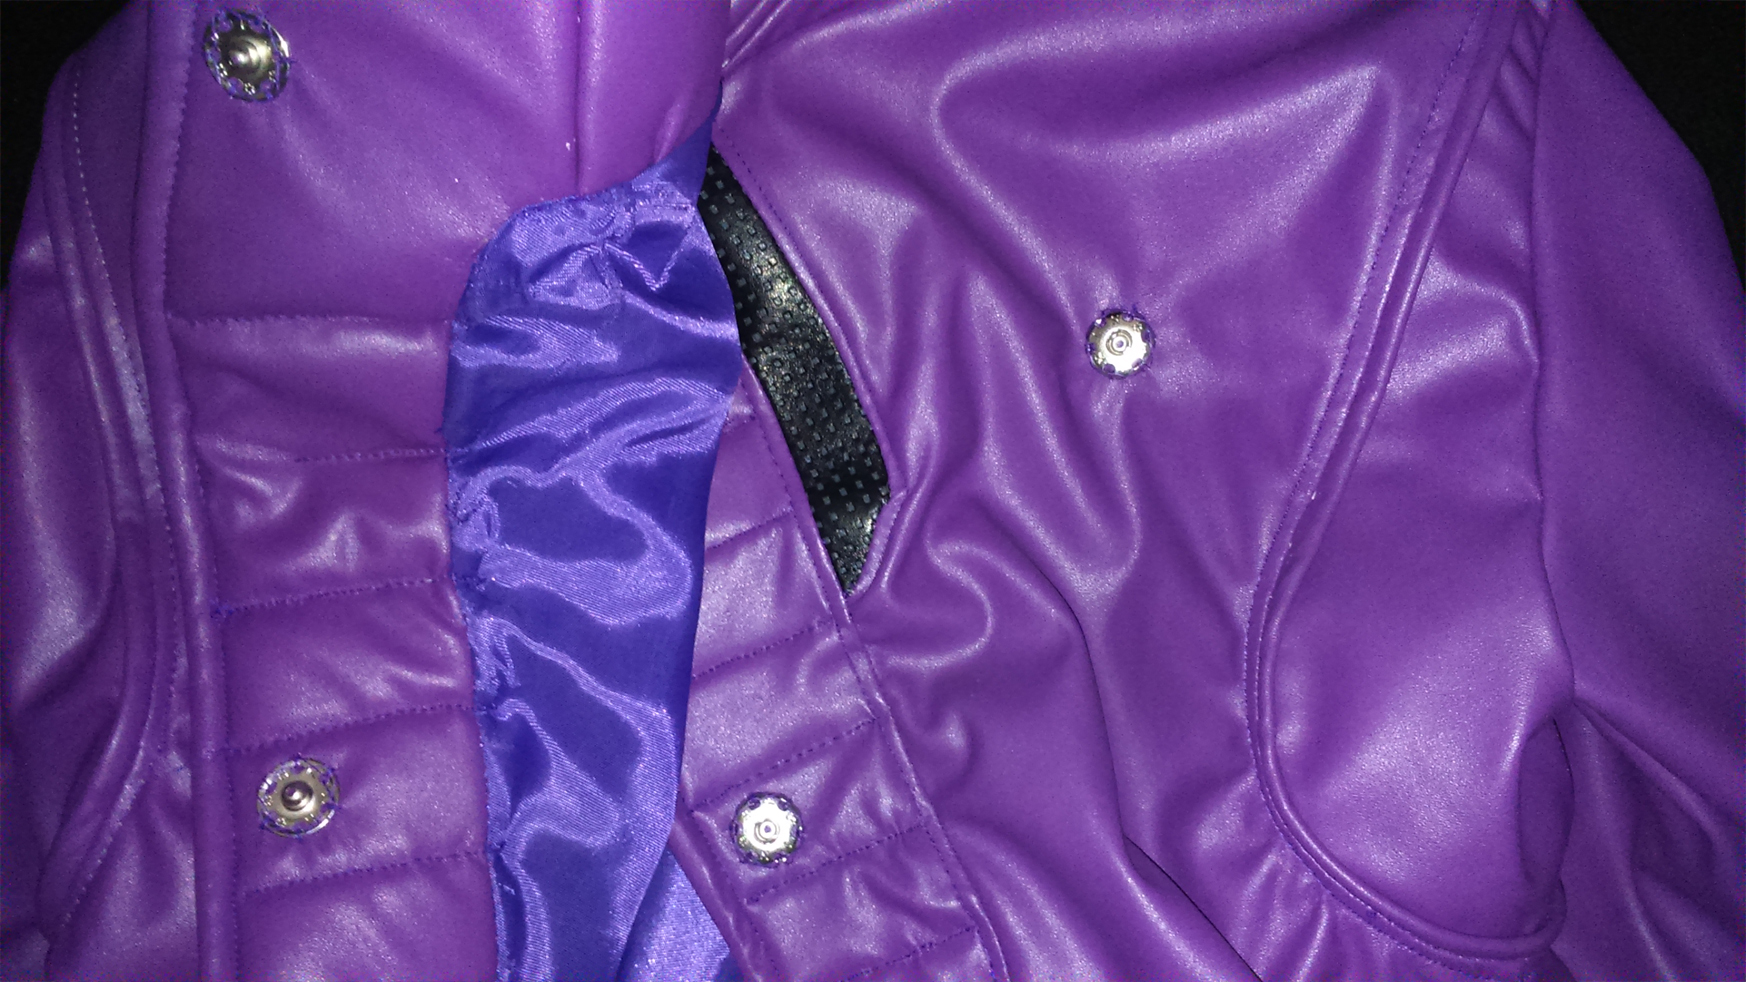
And that’s all! I still have to add some details, accessories and LED lights, but in sewing terms, this garment is finished!


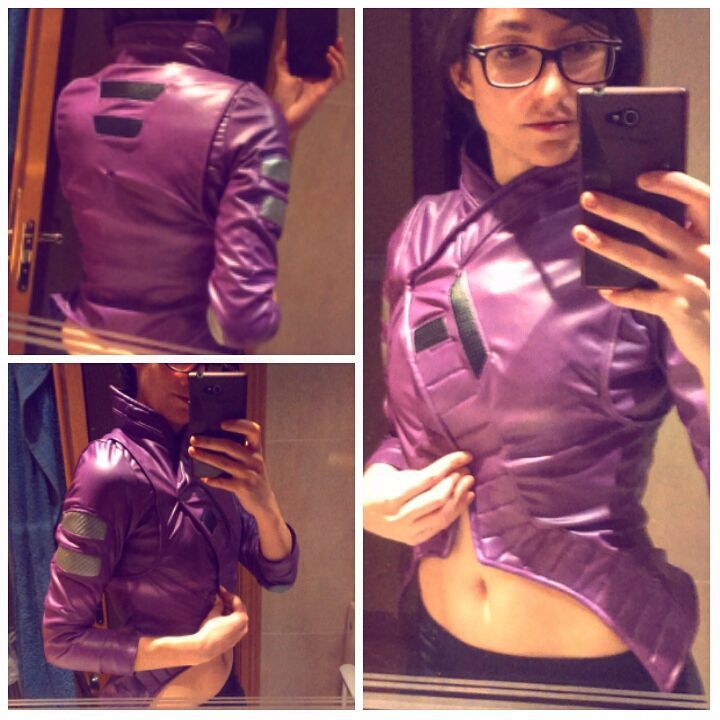
This is currently the best picture I have of the finished jacket. I’ll update this post when I have cool cosplay pictures.
Making the asari headpiece is gonna be fun! I’ve never done something like that before. Well, right now I’m working on my twi’lek lekkus, but I still haven’t moved to the latex part. I’ll keep you informed.
Thanks for reading! Hope you find this tutorial useful. And LONG LIVE THE MASS EFFECT ANDROMEDA HYPE!!!


