Hello!!. Today I’m going to tell you how I made the Maya cosplay, which I wore for the first time this Sunday to the terribly cold Chibi Japan Weekend.
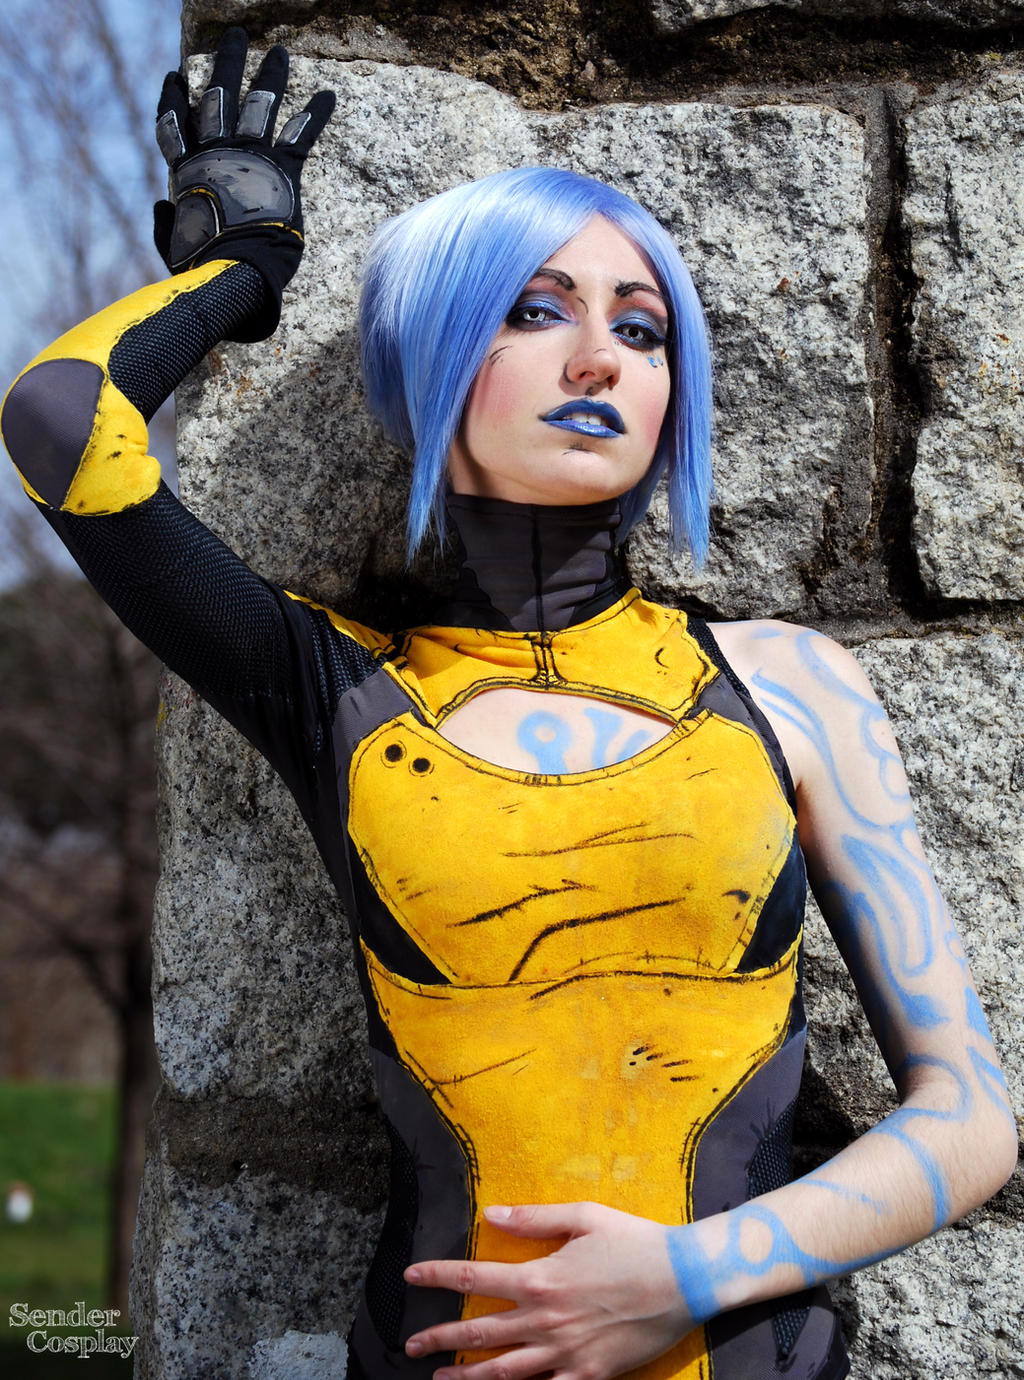 |
| Picture by Sender cosplay |
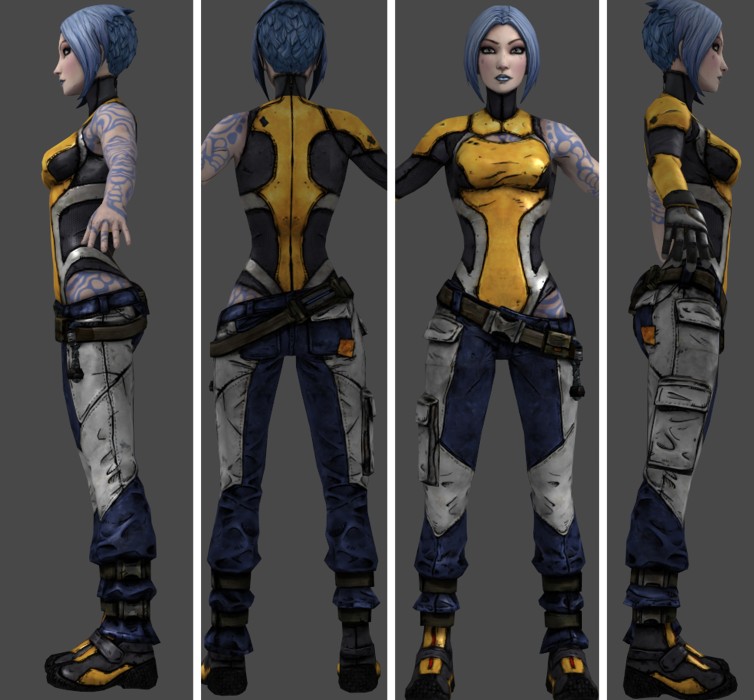
Maya wears a beautiful and kind of sportive outfit with some curious seams. The bodysuit doesn’t have side seams. Instead of that, Maya has a lot of different fabrics put together without using the classic seams. The good part is that it’s a stretchy cloth, so it was makeable with accuracy.
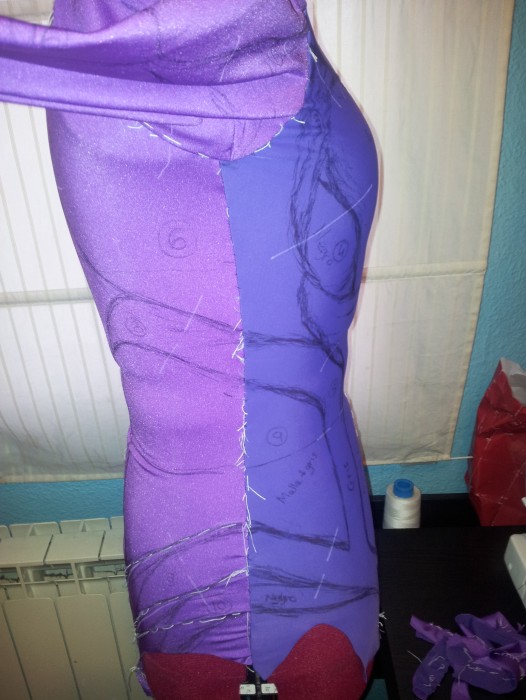
To make the Maya bodysuit, I had to make a previous one using remaining spandex fabrics I had, adjust it to my shape and draw all the bodysuit pieces on it.
I made some research and I found that, if you want to make spandex patterns, you have to multiply the contour measurements (chest, waist and hips) per 0,8 and don’t alter your vertical measurements. This is how you can get your patterns for those stretchy clothes to fit correctly on your body.
Anyway I prefered making a mock-up bodysuit and painting the pieces on it.
Maya’s bodysuit has so many strange shapes that I didn’t dare to pattern it only calculating on paper.

I was reading other techniques, like one that says you have to subtract 17% from the contours (which is practically the same). And another that said that you could find the percentage of elasticity of the fabric by taking a 10x10cm piece, stretching it to the maximum and measuring it immediately after releasing it. In that case, the percentage would be calculated based on the difference between the unstretched and stretched fabric.

I made a couple schemes.

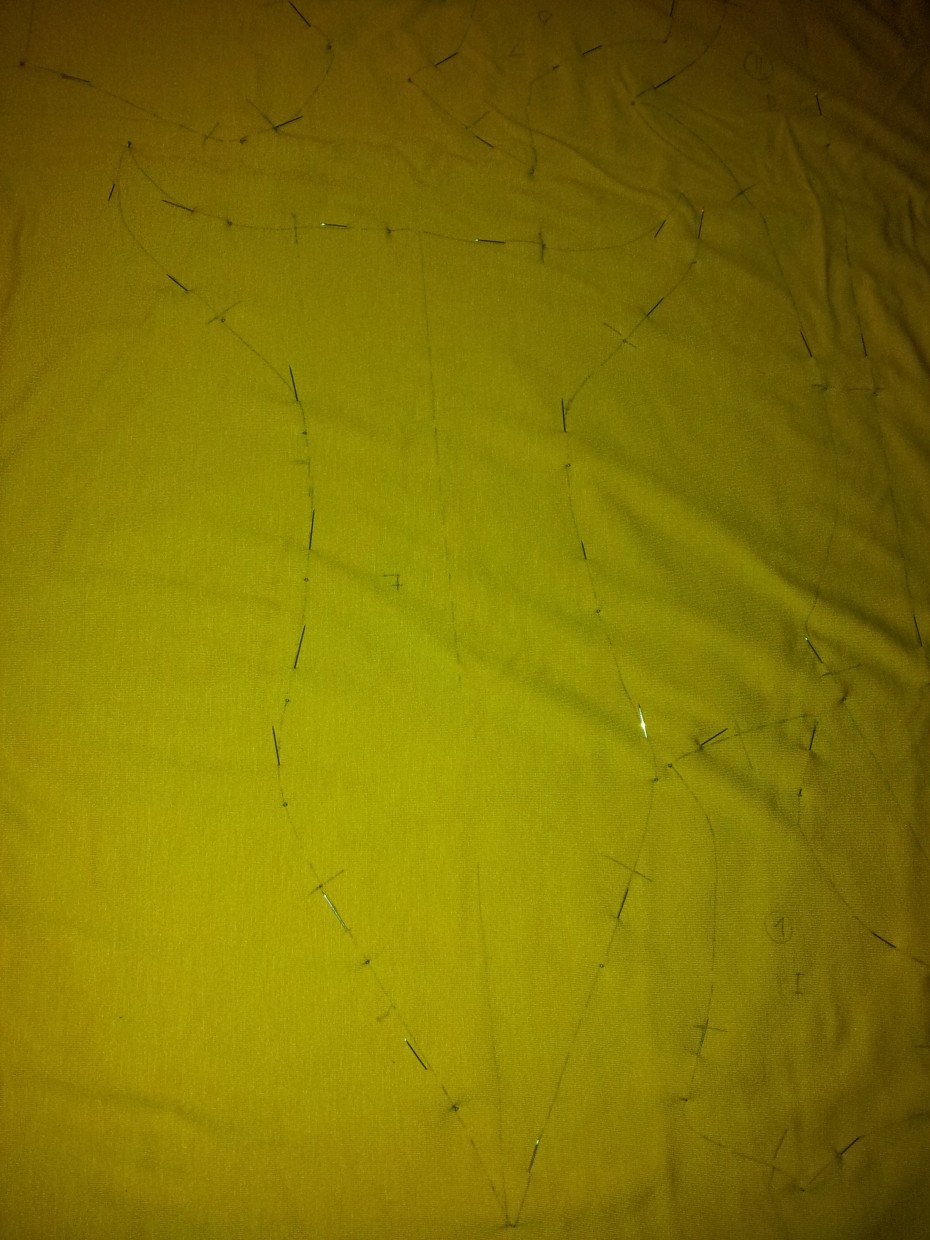
Once I made the test bodysuit, I drew all the pieces on it. I only drew half of it because I only needed those pieces to make it symmetrical.
To make the sleeve I used a regular sleeve pattern.

I put it on the dressform and I put some marks and numbers to avoid getting lost with so many pieces.


One thing I dislike from this costume I made is that I didn’t have into account that, as the fabrics were very stretchy, the hole in the chest had to be little. It didn’t come as fine as I wanted ad it’s a little bigger than I wanted. That happened because the neckpiece pulls it up.
 |
| Patrones del cuello/ Collar patterns. |
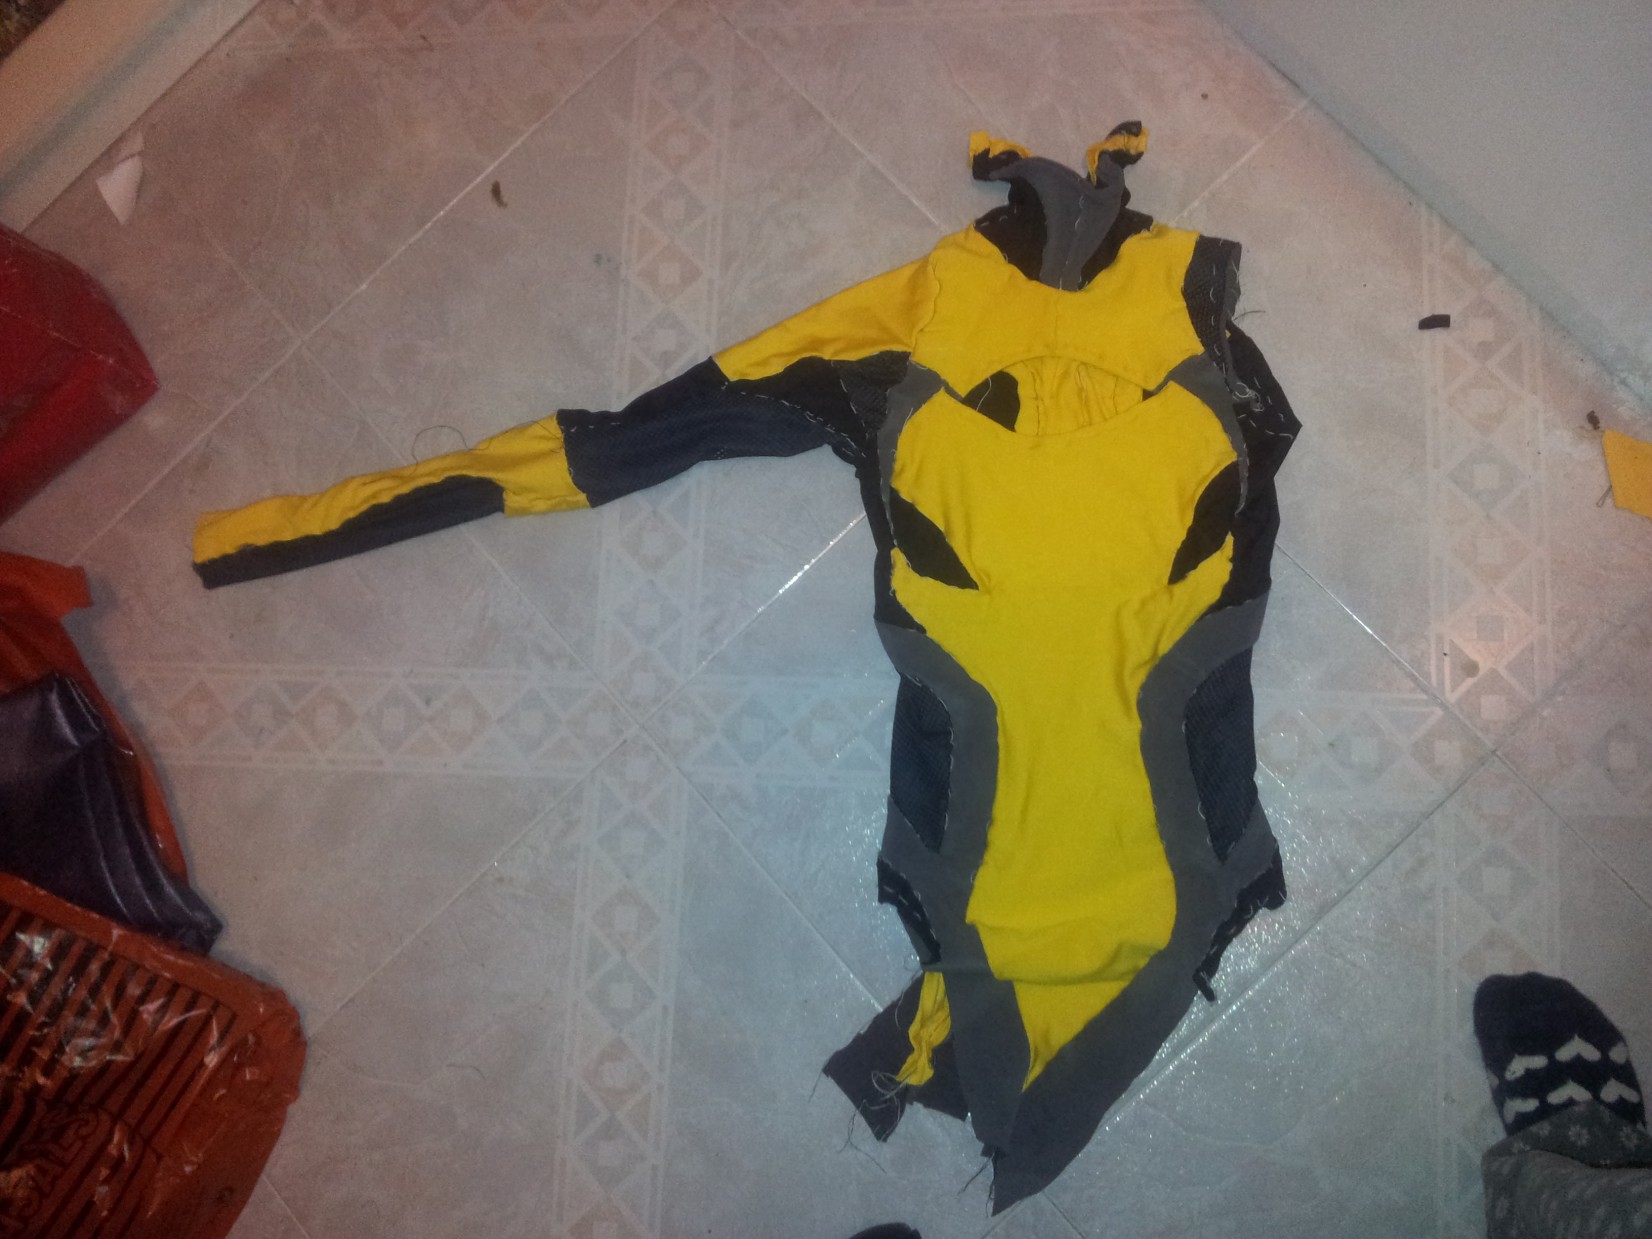
Once the pieces were drawn on the bodysuit, I cut them out and I drew them on paper. And this is the puzzle I got!:

I cut and I arranged everything to see if it had sense or not. As you can see, there are pieces that seem not to fit together. Mainly the waist ones.

 |
| The elbow piece I added later. |
If you’re going to make a garment like this, I highly reccommend you to have a clear blueprint and make sure you check it before and after cutting the pieces. Also, take pictures of every step. This one has so many pieces that it was easy for me to get lost.
I drew the patterns on the fabrics. Stretchy fabrics like these are very difficult to draw on. They’re thin and soft. That’s why I made my patterns on cardboard and put a heavy object on them while painting on the fabrics. I used a pen to draw on them. I know this is not reccommendable, but using a pencil only makes the fabrics move and makes them almost impossible to be marked.
I used a special white marker on the dark fabrics, but I couldn’t use it on the yellow ones because it wasn’t visible.
I used two layers of yellow cotton knit because one layer was very thin. I hold both layers with pins and then I basted them together to mantain their shape together.

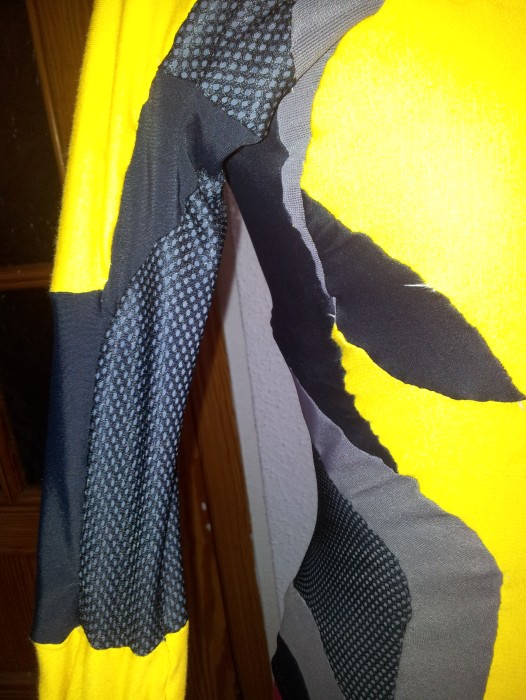
Also, the collar have an extra complication: the yellow fabric goes straight from the back to the neck with no seams. You can see it in the pic below.

The sleeve is also a puzzle, with that mix of black mesh over grey spandex in some parts.

And, at last, I put everything together and machine sewed it. A lot of you have asked me how can I sew together these spandex fabrics and how I get the patters to match each other correctly. I make several things:
1- I baste without making any knot at the beggining or the end of the seam. I usually make a little knot at the end of the thread just in case it slides inside.
2- After basting, I put a pin transversely at the beggining and the end of the seam. You can also put some more along the seam matching with the matching marks.
3- I use the smallest straight stitch on my sewing machine.
4- I stretch it out slightly while I sew it.
And that’s it! Sewing these kind of fabrics is horrible because, when you machine sew it, it doesn’t matter how well basted they are, it seems they move and go to hell. As the fabric stretches, the basting thread slides inside (that’s why I usually leave a lot of remaining thread), but putting some pins you make sure everything is in its place.
I don’t know if this technique is very professional, but it worked for me.
I finished off the edges of the inner chest hole before sewing the surrounding pieces.


The sleeve:

Some other parts:
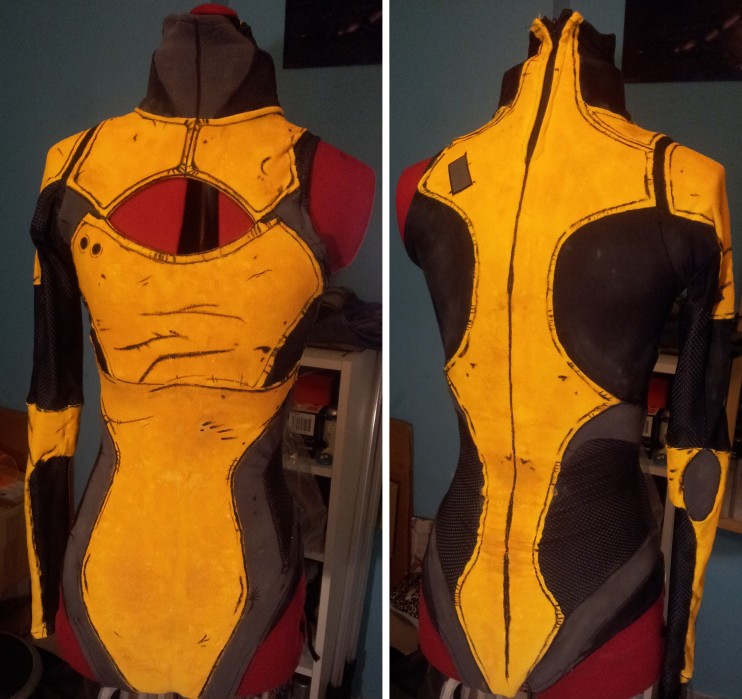
Then I had to make the weathering. I used a sponge and several shades of acrylic yellow paint. I used a permanent black marker for the cell shading effect.


And this is the final result:
One of the advantages of this bodysuit (apart from the suffering of sewing stretchy fabrics) is that the lower part is covered by the trousers so I was able to put a little zipper on the upper part of my back and join the crotch with a couple buttons. This has a very simple explanation: I wanted to be able to go to the toilet without needing to take off the whole costume (and because sewing a zipper on lycra is a nightmare). I always, always try to make my costumes comfortable to go to the toilet. It’s crucial for me as a human being!


