Today I am going to continue telling you how I made this puzzle also known as “Maya’s cosplay”. The truth is that, after making the bodysuit, the rest of the cosplay was pretty easy to me. This is actually not the true order in which I did the Borderlands thing. The first thing I made was Maya’s bodysuit, then Zer0’s jacket and I left the least complicated stuff for last.
But, well, let’s go piece by piece. First of all, I here’s the model:
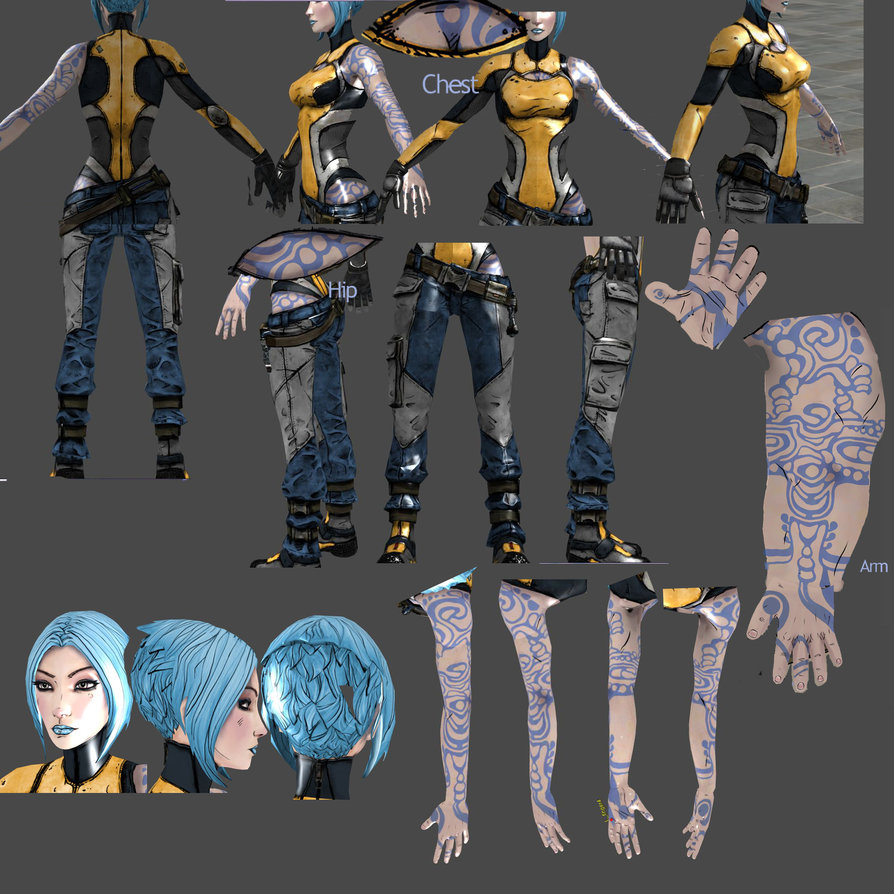
This lady is wearing denim style pants (spring-summer) higher on one hip than the other and with one calf pulled up. So I used some very cool, slightly stretchy denim fabrics that I found thanks to Dani and Juan, who accompanied me shopping that day and answered my textile doubts. A worn and shiny blue one and a black jean that I used the back of, which was gray.
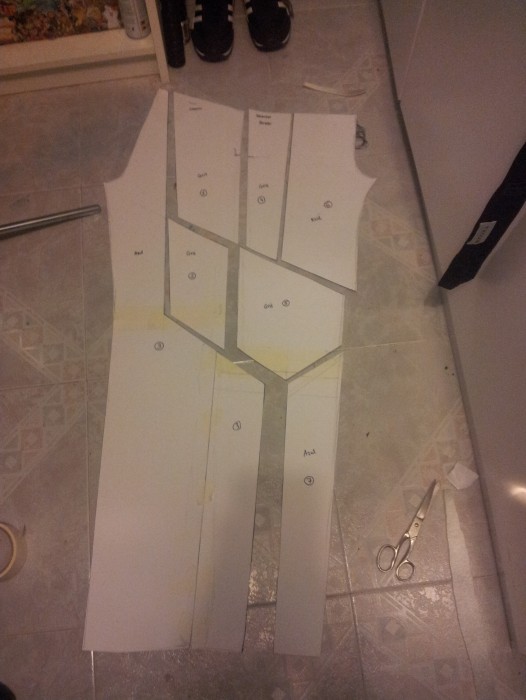
To get the patterns, I used the most tacky but effective technique: directly copying a folded pair of pants (and I learned this from Yurio, who once put it on his blog). I think it looks pretty clear in the photo.
The pants consist of four equal pieces, a little higher at the back to cover the butt well, joined together. And that looks very good when the pants are folded just as they appear in the photo. From there half a leg would come out and the remaining three would be the same; two with the shot facing one side and another two to the other.
I didn’t copy my pants as is because Maya’s is a little wider at the bottom; but to have the shape of the rise this technique is infallible.

In the photo below you can see the equivalent of a trouser leg. Knowing more or less where the knee landed, I had it all figured out.

I cut out each piece and joined some with tape to create a joint between them. Because Maya’s pants in the calf area do not have side seams like normal pants, but rather have them in the front. Little details.
As always, numbered each piece.
After this I transferred the patterns to the fabrics, sewed them and this is is what came out:

With this I already had the basic shape of the pants done. I hemmed the waist so that it would be lower on one side than the other and then all I had to do was add the pockets and give it a bit of that cowboy look by making the waist with the straps for the belt and the little button.
I’ve never made pants in this style before, so I can’t wait to see if it even remotely resembles a real pair of jeans.
I made and attached the straps for the belt.

Then I added the waistband (I don’t have photos of that) and made the pockets.

And now I only have images of the finished pants. I put the straps on their legs and that’s it.


And that’s all for today. I still have to explain how I made the shoes, the glove and the wig. Until next time!.


