Hi! Today I’ll talk about a photoshop element I can’t live without: blend modes.
If you’re not familiarized with photoshop layers, you already have to be! Layers are an essential thing to make photomontages. They are like sheets of stacked acetate that make us able to edit differet parts of the picture without destroying them.
Here you are a clear explanation.
Blend modes are elements that change the way layers react with each other. Thanks to this, we can combine different layers to obtain different effects. Here and here you have a couple explanations.

There are several super cool ways we can use the blending modes in our cosplay pictures: to add fire, sparkling effects and for more subtle effects such as slight light effects and textures. Maybe I’m not very masterfull at them, but they work for me.
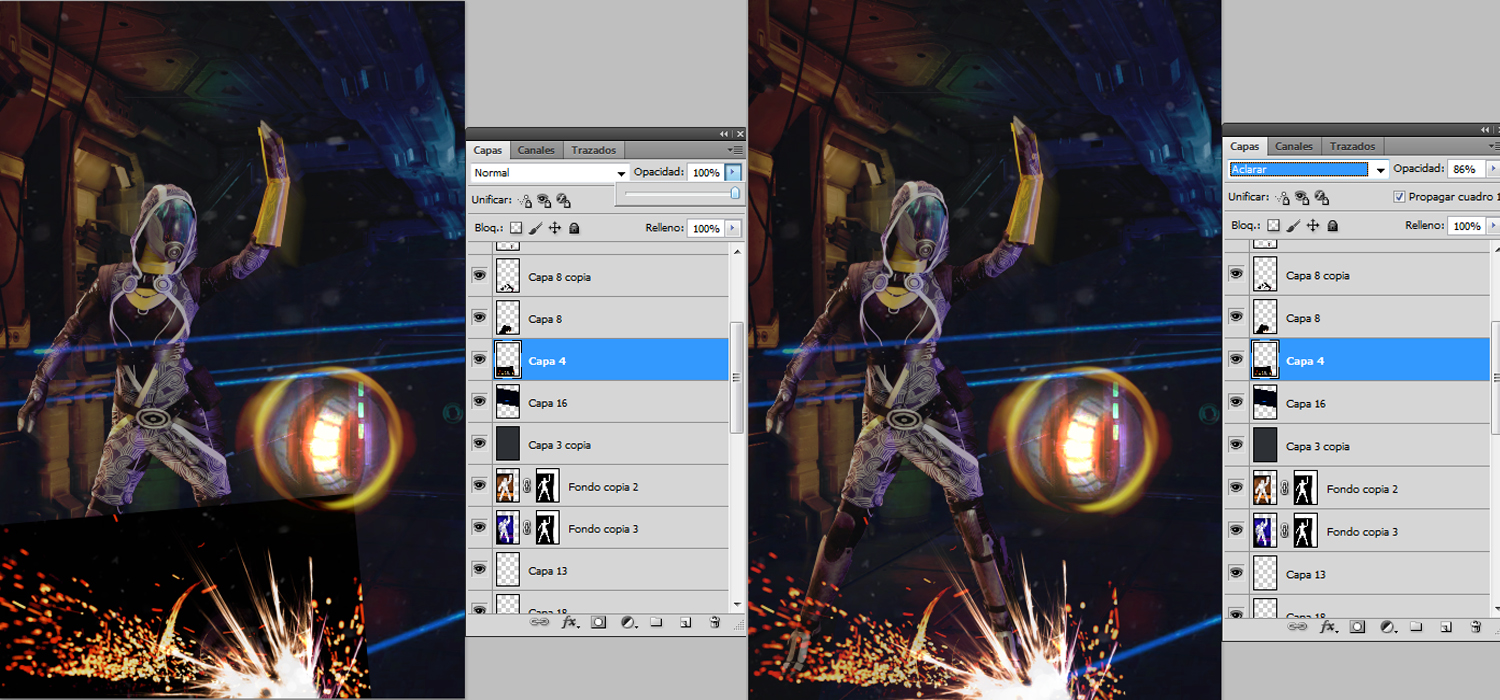
Fire and sparkling effects.
Adding cool little sparkling effects to our pictures is much easier than it looks. We don’t even need to crop anything. We just have to use a picture of the effect we want to add (fire, sparks, flares, smoke…) over a black background and blend it with the rest of the picture using the dodge or lighten mode . We can put these effects in different shots of the photography to create depth sensation.
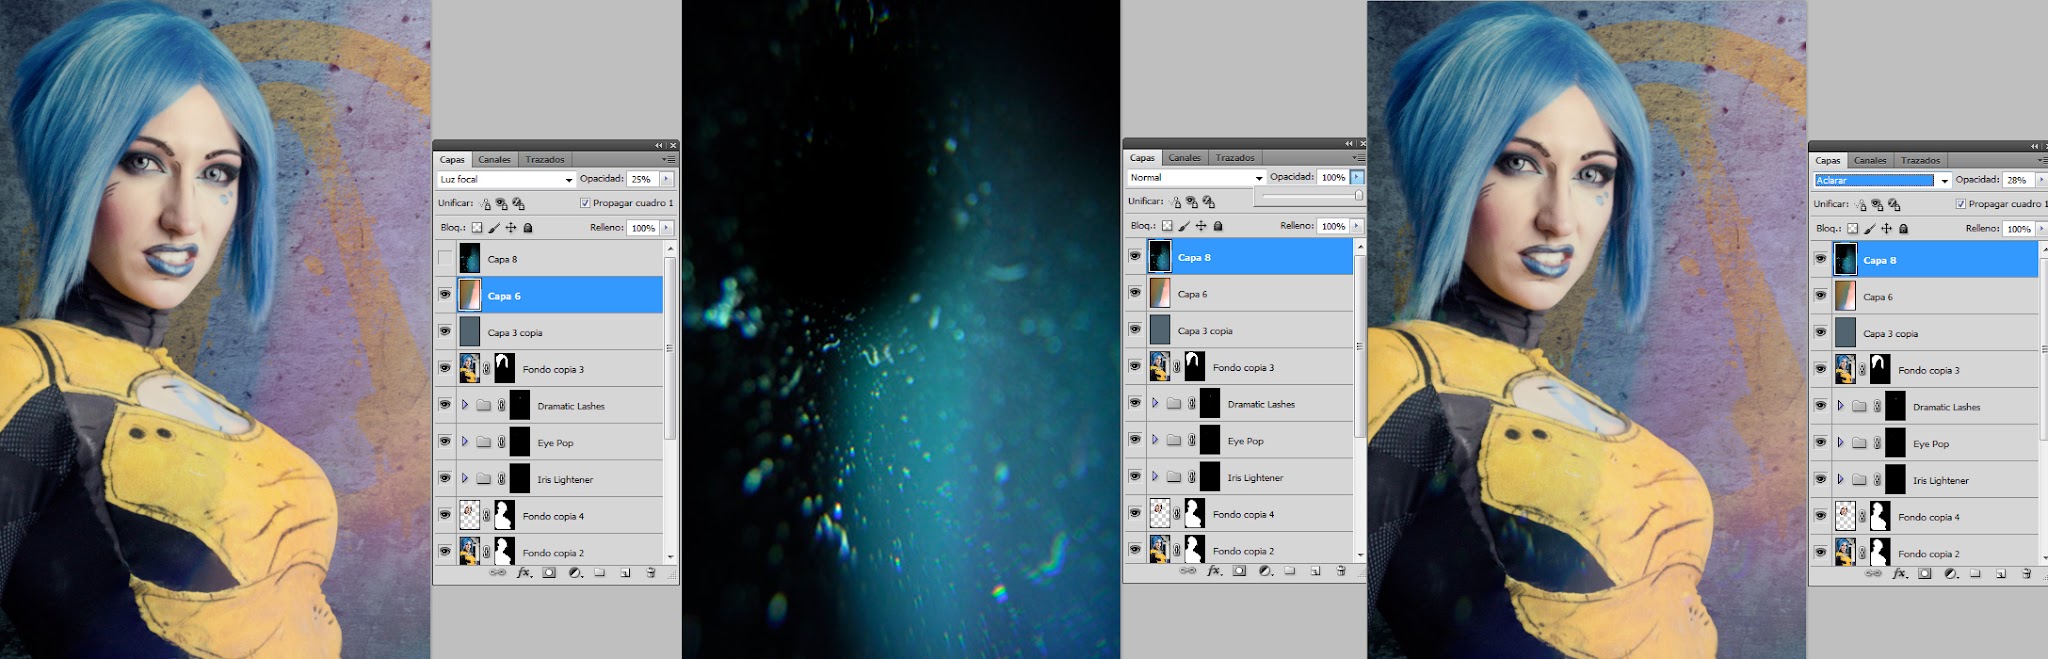
Soft light leaks.
This effect is pretty useful to create ambient effects and to match the overall lighting in the picture. I usually look for “light leak” on google images and there appear a lot of different lighting effects ready to copy and use in our pictures.
It’s as simple as adding the effect image over our picture, blend it in linear dodge or lighten mode, adjust the opacity and done!
Textures.
Sometimes it looks like the textures of the elements in our pictures don’t match with each other. To solve this problem, I usually search textures in google and I apply them over the finished picture trying several blending modes till I get the effect I like. You have to be creative and use your good taste to make it look cool. If the color of the texture doesn’t match the picture, you can always change its hue.
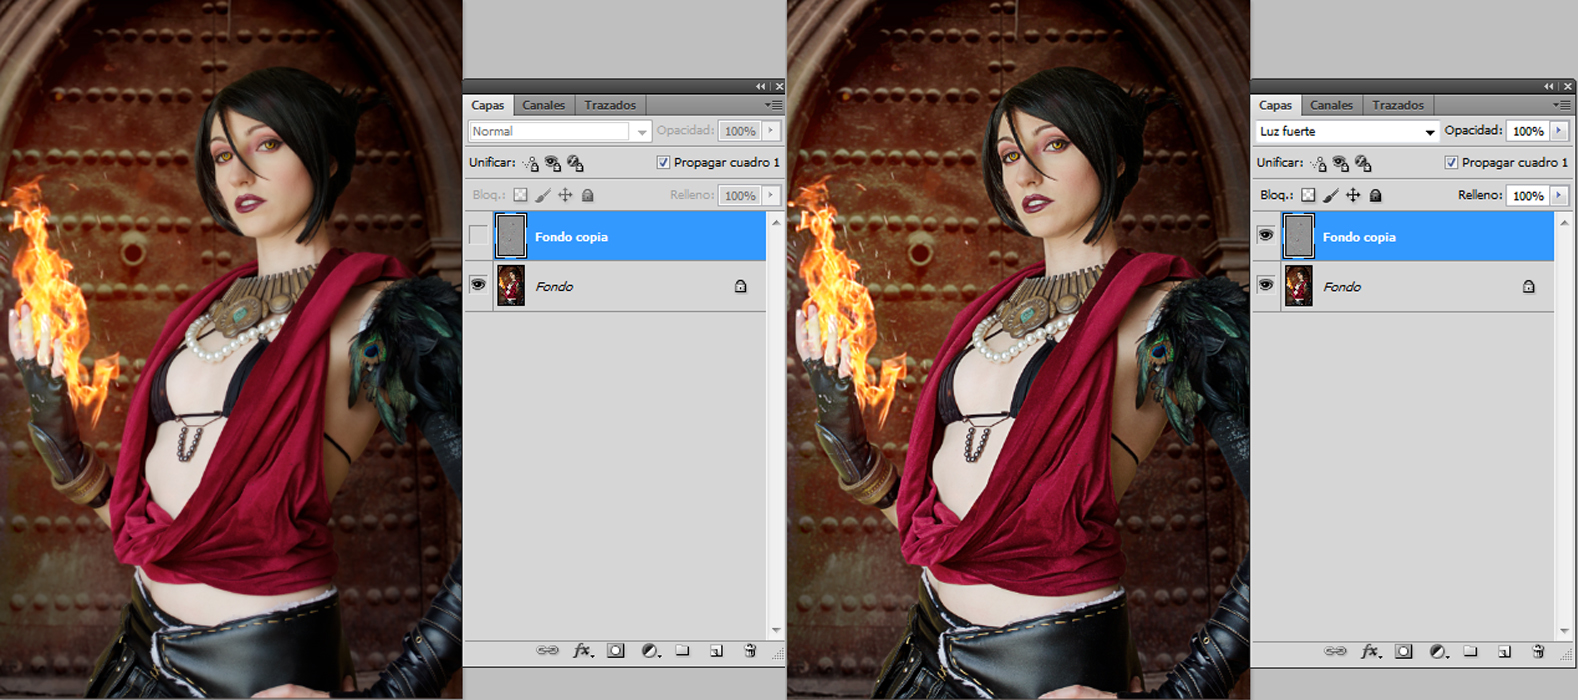
Bonus: Intensification.
This is another way to unify the picture appearance and make it look more dramatic once it’s finished. We duplicate the picture, we choose the top layer and go to filters>other> high pass and select a value that makes the features such as the eyes and the lips stand out a little without getting to see colors. Then we mix it with the lower layer using the hard or vivid light mode (according to our taste), we adjust the opacity and ta daaaa! The picture doesn’t look as soft as before.
And that’s all for today, guys! Now you have some cool resources you can practice with. My own personal advice is that less is more. Sometimes is more a matter of good taste than a matter of knowledge. Filling your pictures with tons of effects just ruins them. The key is to adjus the opacity on each blended layer to create subtle verisimilar effects that don’t disract from the subject. Anyway, you know, there’s no accounting for taste.
As always, you can find me on facebook, twitter, etc. If you hav any question, advice or critique, feel free to comment below.
Thanks for reading!


